Amiga Productivity Software

Cloned from various wiki pages

Introduction

This article describes productivity software written for the Amiga series of computers, and describes the AmigaOS operating system and its derivatives AROS and MorphOS. This is the main article, Amiga Software Split. See also the related articles “Amiga Internet and Communications Software”, “Amiga Music Software”, “Amiga Programming Language”, and “Amiga Support and Maintenance Software” for additional information about software running on Amigas.

History

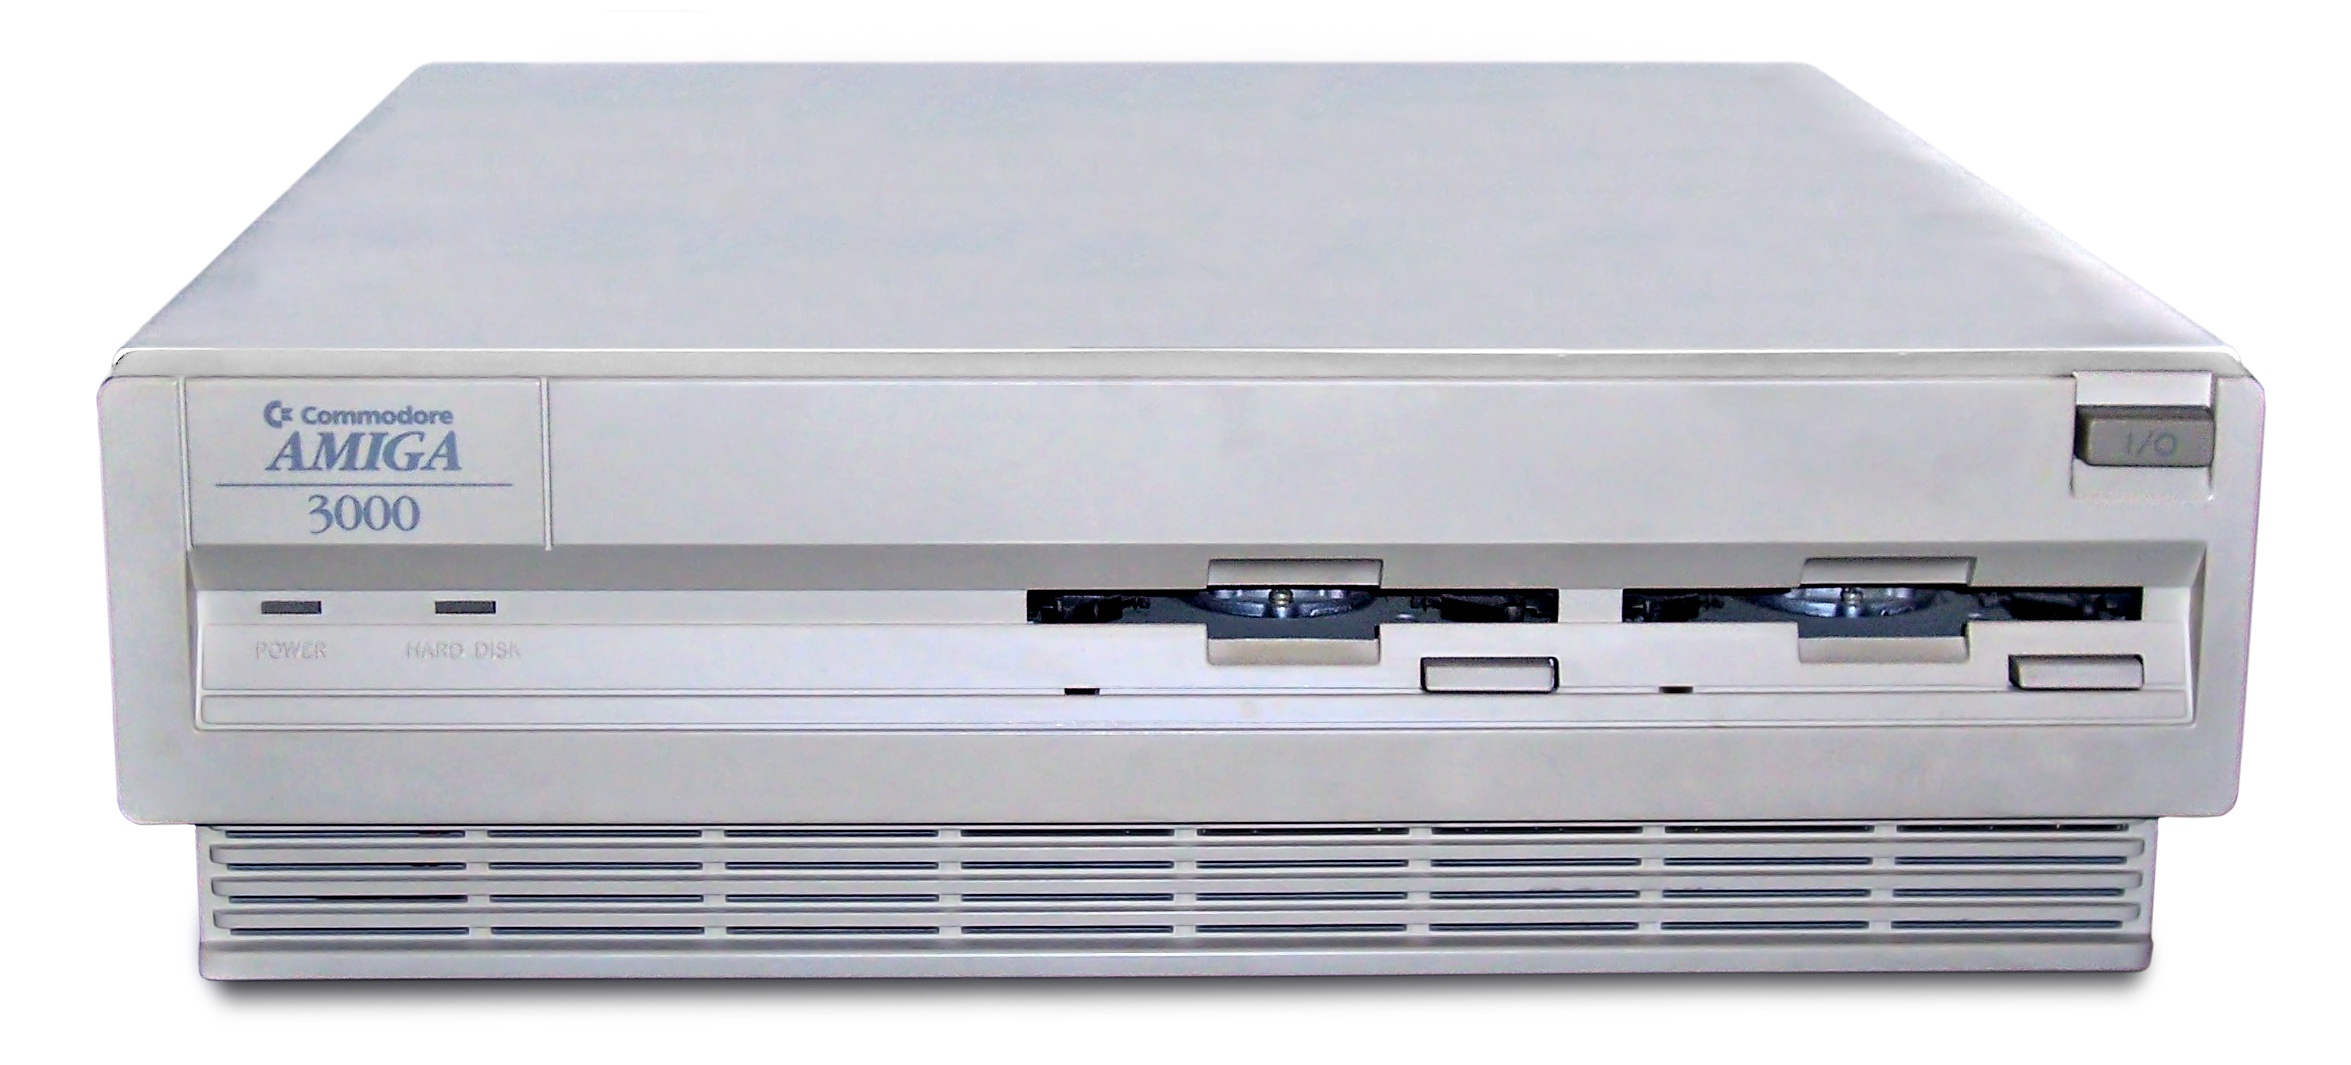
The Amiga initially supported well-known software titles such as WordPerfect, Electronic Arts’ Deluxe Paint, and Lattice C. One of the first all-in-one graphics and video editing packages, Newtek’s Video Toaster, started on the Amiga. The Video Toaster was one of the few accessories for the “big box” Amigas (2000, 3000, and 4000) that used video slots, allowing a user to turn his Amiga into the center of an entire television production suite. Newtek’s later addition of Video Flyer enabled the first non-linear video editing program for the Amiga. Amiga brought 3D ray-traced graphics to the public with Sculpt 3D. Before the Amiga, raytracing was only available on dedicated graphics workstations such as SGI. Other ray tracing software also included TurboSilver. The Amiga is well known for its 3D rendering capabilities, and many titles have been added to the mix over the years. Some titles, such as Maxon’s rendering software Cinema 4D and his Newtek’s LightWave, which was originally part of Video Toaster, were later ported to Microsoft Windows and continue to thrive there. The Video Toaster itself has also been ported to the Windows platform. LightWave was used for low-cost computer-generated special effects in the early 1990s, and Babylon 5 is a notable example of a TV series that utilized LightWave. Even Microsoft was creating software for use on the Amiga. AmigaBASIC is an advanced BASIC software development environment with integrated development environment (IDE) created by Microsoft under contract.

Graphics software

The Amiga started in 1985 with a stronger attitude toward graphics than other PCs of the era, due to its unique hardware and multimedia chipset. The graphics chip Agnus has bit blitter and copper circuits that can access RAM directly, steer it with DMA (direct memory access) privileges, move pixel ranges on the screen, and directly process the TV’s electron beam. I was there. It can render graphic screens with different color depths (his HAM mode with 2, 4, 8, 16, 32, 64 and 4096 colors) from 320×200 up to 720×576 pixel graphic pages. Amiga includes Graphicraft, Deluxe Paint, TVPaint, Photon Paint, Brilliance! (a program realized entirely based on the suggestions and wishes of renowned computer artist Jim Sachs), Aegis Images, ArtEffect, fxPAINT, and a huge number of other applications. Released graphics software program. By IOSpirit, Cloanto’s Personal Paint, Photogenics, Express Paint, Digi Paint, XiPaint, PerfectPaint, SketchBlock 24-bit paint programs (by Andy Broad, for AmigaOS 4.x users)

Graphic applications on AmigaOne systems

Unlike the Commodore Amiga system, the AmigaOne system does not have an integrated multimedia chipset. AmigaOne systems, like Macs and PCs, feature a sports AGP/PCIe graphics card, built-in audio AC’97 sound system, and even some professional models can use PCI/PCIe audio cards. Faster CPU performance enhancements and the availability of standard enhanced graphics cards create a new generation of graphics software for AmigaOne machines such as the Hollywood “Visual Programming Suite”. This also makes it easier to port modern open source software like Blender3D.

Visual programming

The Hollywood Suite program by German software house Airsoft SoftWair is a multimedia and presentation program available for all Amigas (AmigaOS, MorphOS, AROS) and as recently as 2010 a version of Hollywood was also made available for Microsoft Windows. became. You can load Scala projects and Microsoft PowerPoint “.PPT” files. Its module Hollywood Designer is not only a modern multimedia authoring software, but also a truly complete cross-platform multimedia application layer that allows you to create entire Amiga programs through a visual design approach. It can also save executables in a variety of formats, including 68k Amiga, WarpUP, AmigaOS 4, MorphOS executables and his Intel X86 code for AROS. The latest version of Hollywood allows you to create executable programs for Intel Windows machines, Mac OS X for PPC processors, and Mac OS X for Intel processors.

Modern graphic software

There is some fairly modern graphics software available for AmigaOne machines, and some is still available for the Amiga platform. Born in 1991, TV Paint was one of the first commercial 32-bit graphics software on the market. The latest version of the Amiga (3.59) was released in 1994 and is indeed publicly distributed, although the source code is still proprietary. It’s still a viable graphics program and continues to be used despite its age due to its ease of use and sheer number of features. Programs like Candy Factory for AOS 4.0 are designed to create special effects for images, brushes, and fonts to create gorgeous Internet objects and buttons used in web page design. Pixel Image Editor (formerly Pixel32) is available for MorphOS. Blender 3D is one of the best open source cross-platform software. Also, the first pre-release of GIMP is available for He AmigaOS 4.0 through the AmiCygnix X11 graphics engine. Since release 2.1 in 2008, MorphOS includes its own standard painting utility called Sketch, which is simple but powerful. AROS bundles the last free version of Luna Paint, which is actually a commercial paint program for various operating systems.

Graphic utilities

As with any operating system, there cannot be only bitmap and vector painting software. Aimed at allowing authors to directly create drawings or manipulate existing image files, these leading software are surrounded by unique features created to support the leading graphics programs. There is a vast market for graphic utilities that For example, the Amiga has very professional software, including at least some of the most important and widely used software on the Amiga market, such as Cinematte, CineMorph, Morph Plus, Impact!, Essence, Magic Lantern, and Pixel 3D Pro. It is worth noting to mention a few. Of the vast array of graphics utilities that were available for purchase by seasoned and professional users of the Amiga platform during the Golden Age, here are just a few of the most notorious. Cinematte utilities make it easy to create complex photorealistic composites of subjects shot against blue-screen or green-screen backgrounds. Accurate blue screen compositing uses the same advanced technology used in film technology around the world. CineMorph is a program that automatically creates a morphing effect between two specified original images and a composite his third image, or any animated movie associated with the morphing effect. Morph Plus performed the same effect as Cinemorph. Impact! I created a physics simulation in a 3D scene. Essence was a texture maker that applied textures to his 3D surfaces of objects created with 3D tracing programs. Amiga Magic Lantern is a true color animation compressor and player for the Amiga that uses the Pixel 3D Pro utility to create models of 3D objects and save them in various 3D formats, or to convert model objects into 3D files. It was used to convert from one format to another.

Vector graphics

Common formats widely used for Amiga vector graphics are EPS and IFF DR2D. This is because the Amiga was the first platform to run Ghostscript natively, and IFF DR2D is the original vector graphics produced by the Amiga ProVector and later adopted by other applications such as Art Expression and Professional Draw. This comes from the fact that it is standard. The most popular Amiga drawing and vector graphics utilities are Aegis Draw, his ProDraw (Professional Draw) from Gold Disk Inc., DrawStudio, Art Expression, and ProVector. You can also use Professional Page and PageStream tools for some basic vector graphics. The newest vector graphics programs on the Amiga are actually MindSpace 1.1, primarily aimed at designing flowcharts, mindtables, UML, and diagrams, and Steam Draw, a 2D simple vector painting program available on MorphOS .

Flash and SWF

SWFTools is a collection of command-line programs for converting and saving various raster (bitmap) image formats to the Flash SWF vector animation format.

Tracing software

AmigaOS provides Autotrace, Potrace, and XTrace, widely used, free, and distributable vector-to-graphics conversion capabilities that also run on AROS Amiga open source clone OS and MorphOS Amiga-Like systems. The Desktop Publishing software PageStream includes a tracing utility as bundled software. The structured drawing program ProVector had an optional add-on tracing utility named StylusTracer.

DXF, EMF, SVG file formats

Various programs can read DXF (almost all Amiga CAD programs), EMF, SVG, CGM, GEM and WMF. An example of a conversion tool that reads many formats and outputs DR2D is the Amiga program MetaView. There is also an SVG data type that provides direct OS support for loading and saving files in SVG (Scalable Vector Graphics) format on any program.

Computer aided design

The Amiga was initially thought to offer the most powerful graphics platform at an affordable price.[1][2] A variety of CAD programs were available, including X-CAD, IntelliCAD, DynaCaDD, MaxonCAD, IntroCAD, and even programs for designing and testing electronic circuits such as ElektroCAD.

Animation, Comics and Cartoons

The Amiga’s unique capabilities in multimedia and the capabilities of its bit-blitter circuitry allowed it to perform advanced animation and video authoring at a professional level in the 1980s, and led to the creation of a vast amount of software that also catered to this field. I did. Top of the professional video editing market. The Amiga supports animation programs such as Aegis Animator, Lights!Camera!Action!, DeLuxe Video, Disney Animation Studio, Deluxe Paint versions 3 and later, The Director (a BASIC-like language for animation), Scala, and Vision. It was possible. From Commodore itself, VisualFX from ClassX, Adorage multi-effects program from proDAD and Millennium from Nova Design. ImageFX, art club professional. Amiga had various animation software. Comic Setter for creating printed comics by placing brushes representing cartoon characters, combining them with background images, and overlaying appropriate frames and “speech bubbles” with their own text speech and captions. It was an interesting tool. You can also print your comics in color. Disney Animation Studios was one of the most powerful 2D programs to bring animation to life. Released on the Amiga, the program also features a full cell-frame preview, and was used by many animation studios around the world during that era, and is still used today by several European studios as a useful preview tool. It has been. This software is primarily used by independent and animation studios. Amateur animator.

Authoring and VideoFX

The golden age of the Amiga had access to a huge range of animation and video authoring software. Aegis Animator, Lights!Camera!Action!, DeLuxe Video, Disney Animation Studio, Deluxe Paint 3 and later versions, The Director (a BASIC-like language for animation), Scala, Commodore’s own Amiga Vision, ClassX’s VisualFX, proDAD’s Adorage Multi Effect program, Andreas Maschke’s Wildfire (later ported to Java by the author), Nova Design’s Millennium, Nova Design’s ImageFX, and ArtDepartment Pro.

3D modeling, rendering and animation

3D rendering and animation software includes Sculpt 3D, TurboSilver, Aladdin4D, Videoscape 3D, Caligari, Maxon Cinema4D, Imagine, Newtek’s LightWave, Realsoft’s Real3D, Vista Pro, World Construction Set 3D terrain rendering programs, and Italian company Eyelight’s Includes Tornado3D.

Amateur and professional video editing

The Amiga was the first commercial Amiga to enable video editing by amateurs and professionals, with connection to TV sets, video codecs, chroma keying, processing of genlock signals, full-screen capability with overscan functionality, and superior noise. A computer platform. -Gain ratio. The Amiga and its video peripherals (primarily genlock boxes and digitization boxes) were available at affordable prices in the 90s, and this made the Amiga one of the leading platforms in the professional video market. It could also handle broadcast video production (Newtek VideoToaster), and despite the demise of the Commodore, the Amiga saw its golden age as a professional video platform around 1992-1994. There was a huge amount of video platforms available for the Amiga. Resale of GFX and image gallery data files applicable to all kinds of video software, graphics equipment, and video production. Among these software is the leading Amiga for desktop video with both linear and non-linear editing with 4.2.2 features, called NLE, made by Newtek and available in the VideoToaster Flyer external module for video toasters. It’s worth mentioning video editing programs. (non-linear editing), Amiga MainActor, Broadcaster 32 and Elite (with Producer software), Wildfire for vfx by Andreas Maschke (now Java), extended Amiga card PAR, VLab Motion (with Movishop software), and VLab Pro.

Word processing and page layout

Desktop video proved to be the main market for the Amiga, but starting with Textcraft, the first Amiga text program that combined a real word processor with advanced text, a proliferation of word processing, page layout, and graphics software became professional. met the needs of Although it is an editor, you can change the page layout, fonts, increase or decrease the width, change colors, and add colored images to the text. Notable word processing programs for the Amiga included the then industry standard WordPerfect up to version 4.1, Shakespeare, Excellence, Maxon Word, Final Writer, Amiga Writer, Scribble!, ProWrite, Wordworth, and a small version of Personal Write by Cloanto. will appear. Page layout software included Page Setter and Professional Page from Gold Disk Inc. and PageStream from Soft-Logik, now known as Grasshopper LLC. Only PageStream has been ported to other platforms and continues to be developed and supported by developers. Graphics software includes vector drawing applications such as Art Expression from Soft-Logik, ProVector from Stylus, Inc. (formerly Taliesin), Draw Studio, and Professional Draw from Gold Disk Inc. The Amiga didn’t have what we would call an office suite, but it did have integrated software. Pen Pal was a word processor with an integrated database and form editor. graffiti! ,analysis! And get organized! We have summarized them as Works! A suite that combines word processing, spreadsheets, and databases. Although the names were similar, it had nothing to do with Microsoft Works. The page layout language LaTeX was available in two ports of his, AmigaTeX, which is no longer available (the first his LaTeX can be edited with a front-end program), and PasTEX, available in the Aminet repository. The latest software AbiWord is now available for AmigaOS 4.0 via the AmiCygnix X11 graphical engine, and Scriba and Papyrus Office pre-releases are available for MorphOS.

Text editors

Text editors available for the Amiga include Vim, Emacs, MicroEMACS (included), Cygnus Editor, also known as CED, and GoldED, which evolved into the Cubic IDE in 2006. UNIX ne editor and vi clone Vim was originally developed on the Amiga. Development of text editors didn’t stop with the Amiga. Since 2001, MorphOS has had a limited edition of GoldEd available called MorphEd, and since 2008 Cinnamon Writer and NoWin ED, a universal editor that works on platforms like the Amiga. Cinnamon Writer adds new features with every new release and aims to be a full-featured word processor.

Database and spreadsheets

In the first days of the Amiga (1986-1989), cross-platform spreadsheets were available, such as MaxiPlan for MS-DOS and Macintosh. Logistix (real name LoGisTiX) was one of the first spreadsheets for the Amiga, the Microfiche Filer Plus, a database that gave users a data exploration experience similar to using microfilm. SuperBase was one of the best programs available for C64. It was later ported to Atari, Amiga, and then PC. On the Amiga, however, it became the standard reference, available in his two versions, Superbase Personal and SuperBase Professional. It could handle SQL databases and had a query internal language such as BASIC. For many years before Microsoft Access, you could create forms and masks on records and incorporate multimedia files into records. Superbase also had VCR control style buttons for browsing records in the database. Softwood File II was another simple multimedia database that later evolved into Final Data. This is a great database available for Amiga by Softwood Inc. From the same company was the very powerful spreadsheet Final Calc, similar to TurboCalc from the German company Schatztruhe. ProChart is a tool for drawing flowcharts and diagrams. Analyze! It was a fairly versatile (for its time) spreadsheet developed for the Amiga. sort out! It was a flat file database package. Gnumeric spreadsheets have also been ported to the Amiga through an X11 engine called AmiCygnix. More recently, MUIbase was born, and his MySQL database language, which is primarily cross-platform, is also referenced on his Amiga. SQLite is a self-contained, embeddable, zero-configuration SQL database engine, also available on AmigaOS 4 and MorphOS. In February 2010, Italian programmer Andrea Palmatè ported his IODBC standard to his AmigaOS 4.

Science, entertainment and special use programs

Maple V is one of the best general-purpose mathematical software (also known as Mathematic-CAD) ever created. It was also available on the Amiga and was highly appreciated by many scientists who were using Amiga at the time. Distant Suns, Galileo, Digital Almanac, and Amiga Digital Universe (by Bill Eaves for OS4) were stargazing programs and astronomical calculators. In the era of CDTV, many history, science, and science timetables, including Science Timetable, Innovation, Business Timetable, Politics, Grolier Encyclopedia, Guinness Disc, Video Creator, Dictionary of American Heritage, Illustrated Bible, Illustrated Works of Shakespeare, etc. , an art CD was sold. etc. were available.

Entertainment

For the Amiga, there were literally hundreds of entertainment software. Notable programs for children and learning include Free Spirit Software’s Adventures in Math series of floppy disks, Unicorn Software’s Animal Kingdom series of disks, Barney Bear Software’s complete Art School series, the Discovery series including Discovery trivia, Donald’s And so on. Alphabet Chase, Disney Software’s Mickey’s 123’s and Mickey’s ABC, the Electric Crayon and Ferngully series of educational coloring book software (Ferngully was taken from an animated film), the Fun School series of discs, the famous Broderbund Kid Pix disc set from the 90s The Miracle Piano Teaching System to Teach Children Music, The Many Stories of Mother Goose, Centaur Software’s World Atlas.

Fractals, virtual reality, artificial intelligence

Elena Novaretti’s ZoneXplorer is considered by Amiga users to be one of the best fractal experience programs ever created on the Amiga, if not on the platform. In 1989, he created Haitex Resources’ X-Specs 3D glasses, one of the first interactive 3D solutions for home computers. Vivid Group Inc.’s multimedia interactive TV non-immersive virtual reality exploration software Mandala and W-Industries’ (then Virtuality Inc.) Virtuality System Virtuality 1000 CS 3D VRML all-immersive simulator were also created on the Amiga and were used for gaming entertainment. was used for Based on the A3000 and used in large arcade facilities and theme parks. Magellan v.1.1 (artificial intelligence software) is not to be confused with Directory Opus Magellan. It was a program that emulated the responses of artificial intelligence on the Amiga by creating heuristically programmed rules based on machine learning in the form of supervised learning. The user selects the AI ​​decision tree and decision table system that the Magellan program features, inputs the object and desired output, and specifies all relevant conditions and conditions that the machine must follow to output a given pseudo-intelligent solution. Write the rules. problem.

Route planning

AmiATLAS v.6 was a complete route planner tool for Amiga computers. We provide interactive maps around the world and find the best routes to get from one place to another. It also featured multiple map loads, an integrated CityGuide system with information on interesting towns, places, and regions (some with photos as well), and information on many parks and points of interest. .

Personal organizer, notebook, diary software

Digita Organizer v.1.1 by Digita International is the best Amiga program that allows users to note dates, meetings, and remember expiration dates. PolyOrga for MorphOS, by Frédéric Rignault.

Personal budget, home banking, accounts

Easy Banker、Home Account、Small Business Account、Small Business Manager、Account Master、Accountant、AmigaMoney、Banca Base III、HomeBank、CashMaster、Counting House など。

Software for special purposes

AVT (Amiga Video Transceiver) was originally developed by “Black Belt Systems” (USA) around 1990 for the Amiga home computers that were popular all over the world before the IBM PC family achieved sufficient audio quality. Software and hardware slow scan television system. With the help of a special sound card. Richmond Sound Design (RSD) created both Show Control (also known as MSC or “MIDI Show Control”) and theater sound design software. These software were widely used in the theater, theme parks, exhibits, exhibitions, stage management, shows and themed entertainment industry. In the 1980s and his 1990s, and at some point in the mid-90s, many high-profile shows at major theme parks around the world were controlled by Amigas simply through software called Stage Manager. It has since evolved into a Microsoft Windows version called ShowMan. Walt Disney World alone hosts dozens of shows, as well as other Disney, Universal Studios, Six Flags, Madame Tussauds properties, as well as the Mirage Hotel Volcano, Siegfried and Roy shows, and the MGM Grand EFX. It includes hundreds of theaters, including shows, Broadway theaters, London’s West End, many of the Royal Shakespeare Company’s theaters, most of Branson, Missouri’s theaters, and many theaters on cruise ships. RSD bought used Amigas on the web, reconditioned them to provide enough systems for all the shows specified, and only stopped offering new Amiga equipment in 2000. The number of shows on cruise ships and themed venues remains unclear, but is operated by Amigas. .

References

^ An interesting interview with Italian manga studio Strane Mani is available on Amiworld.it (in Italian). ^ Information about the virtuality of the Amiga Hardware site

Videos


Is the Amiga computer manufactured today?

This is a cloned article from quora (which I usually avoid visiting whenever they appear in search results).

The reply was written by Dave Haynie, “Electrical engineer and part-time mad scientist”

The original Amiga Computers were a series of advanced personal computers manufactured by Commodore, Inc. Commodore went into Chapter 7 bankruptcy in late April of 1994. I was one of the hardware engineers working on this computer, the Amiga 3000.

And you would think, since this starts out with a bankruptcy, the answer would be “no,” but in fact, that’s not quite the case. In fact, strangely enough, the deader the Amiga seems to get, the more options you have available. This will take a little explanation.

About a year later, Commodore’s assets were purchased by ESCOM Ltd., a company based in Germany. Over the course of 1995, they managed to put both the Amiga 1200 and the Amiga 4000T, the most recent Amiga models, back into production.

Unfortunately, ESCOM had been on a buying spree, and basically “guess wrong” about PC technology for the 1995 Christmas season. They were in bad financial shape going into 1996, just as their new Amiga Technologies group was collecting the resources needed to move the Amiga forward (I was a consultant on that project). ESCOM went into bankruptcy in 1996.

So, does anyone remember that PC company that put cow spots on their boxes — and apparently, their offices? Gateway 2000 ultimately bought the Amiga assets from ESCOM. For a short time, they were planning to build a new Amiga computer system and a new AmigaOS, but that never materialized. They eventually wound up doing a bunch of weird maneuvers. They licensed all things AmigaOS to a tiny company in Washington State with no reasonable ability to do much of anything with the operating system. Those guys subcontracted an operating system port of AmigaOS from the aging 680×0 ISA to PowerPC… to a video game company, Hyperion in the UK.

And it just got fuzzier after that for awhile. As Hyperion got close to delivering their version of the OS, they were pretty controlling of which computers could run AmigaOS 4.x (the PowerPC version). This was actually happening in 2000–2001, by the time that desktop-class PowerPC chips had basically become Apple proprietary. The whole idea of the AIM alliance, the idea that PowerPC based personal computer hardware could become a commodity similar to that of the IBM PC, had already failed. And so there was nothing mass produced that the Amiga/Hyperion folks allowed to run AmigaOS 4.x. Pretty frustrating.

It wasn’t until 2006 that AmigaOS 4.0, the first PowerPC version of AmigaOS, was actually released. It’s a bit telling about the whole mess of the project that it took less time to actually develop AmigaOS 1.0 from scratch than to port AmigaOS 3.x to AmigaOS 4.x. The targeted systems for this OS were single-board computers, such as the SAM440EP from A-Cube Systems, based on the PowerPC 440EP SOC from IBM. This was intended for various embedded devices, not really comparable to 2006 desktop systems. But it was certainly more than enough to run AmigaOS, which had not gained much computational weight in the move to PPC.

A-Cube systems in Italy, currently sells the upgraded SAM460EX and SAM460CR boards. These are sold as single-board computers, though the SAM460EX is available as an integrated system called AmigaOne 500.

I’d have to say the first serious effort at building a whole PowerPC Amiga came from a new company based in New Zealand, A-Eon. This company was started by Trevor Dickinson, an entrepreneur and rabid Amiga fan who had the means to create a new Amiga computer company. I was skeptical when these came out — they were very expensive. But as I grew to understand what Trevor was doing, and as an engineer myself, started to appreciate that he had managed to get anything out the door at essentially hobby-computer volumes, I started to appreciate this work. And Trevor became a very close friend, despite the miles.

Their current machine is the A-Eon X5000, based on one of the Freescale/NXP QorIQ processors. This is a line of high-end SOCs designed for high performance networking switches and servers. That’s maybe not as weird as it sounds. Much of the MacOS years of PowerPC were bolstered by the fact that Cisco was using PowerPC in all their routers. So for awhile, IBM and Motorola (later Freescale) were happy to develop desktop-class PPC chips for IBM, Motorola, Apple, and others, knowing that, once the development was paid and the prices could drop, Cisco would take as many as they could make.

This actually stopped working because chips got big enough for high performance CPU cores to go on-chip with high speed networking and interfacing (RapidIO, then PCI Express). The desktop CPUs were going in another direction, and while Motorola and IBM might potentially see some reuse in the CPU cores, once they had all the hardware oriented toward optimizing networks, Cisco and the other networking companies didn’t need CPUs that could match AMD and Intel. Apple did… so Apple starting having to pay for a big chunk of PPC development, and as a result, those chips became exclusive for a few years. Everyone else started looking at other CPUs at the high end. But for lower-end stuff, you had a bunch of choices. And I digress…

So there are quite a number of small operations working on “Classic” Amiga systems, meaning, at the least, some kind of 680×0 processor, rather than a PowerPC chip. This one is called the Amy ITX board — I was given one of these. It’s a modern system design, using the industry standard ITX form factor, but accepting all of the original Amiga chips. One of the problems Amiga users have had is that their 30-something-year-old computers are starting to die of old age. Hey, we tried! But if you have an Amiga 500 or Amiga 2000, your old chips will work in this new board.

Another very, very hobbyist option is the Re-Amiga series of boards. The master of Amiga Reverse Engineering, John “Chucky” Hertell, has created a whole series of re-inventions of classic Amiga boards. They support all your corresponding chips — the ReAmiga 3000 board John gave me will take all my critical Amiga chips. But it can use more recent RAM — on SIMM modules — and it’s using standard parts you can actually get today. The trick here — you have to build it yourself, at the component level. I have not built mine yet, but I probably will…. I think I even have the SIMMs for it here! My original A3000 board is dead. He does this as a service to Amiga fans… you can see he kept all our initials on the A3000 board (Terry Fisher/Hedley Davis/Dave Haynie/Greg Berlin/Scott Hood/Jeff Boyer/Mike Nines.. and he’s welcome on that list, far as I’m concerned!) He gave Jeff Porter, the man who made the Amiga 500 possible, his A500 version at an Amiga show in Germany a few years back… Jeff was blown away!

But what if you can’t get Amiga chips? This was addressed by several projects, but the most successful early on was the Minimig project in 2005 by Dennis van Weeren. This is a re-implementation of an Amiga 500 class system, done in a Field-Programmable Gate Array (FPGA) — a programmable chip. The Amiga chips are in the FPGA, while the CPU is a real 68000 processor. This was released as an open source project, so there are a number of variations and spinoffs. Work is still being done on the Minimig design. A-Cube Systems sells a version of the Minimig V1.1 board.

Inspired by the Minimig, Till Harbaum created the MiST board, with the intent of re-implemented the Atari ST. Unlike the Minimig, though, the MiST implemented the CPU as well as graphics chips in its FPGA. And it can load up a new FPGA “core” from its SD card! This lead to Dennis van Weeren developing an Amiga core for MiST. And by now, there are MiST cores for around thirty systems, including Apple, Macintosh, Amstrad, BBC, Sinclair; gaming consoles, and some arcade machines as well.

Inspired by the MiST board, Alexey Melnikov (Sorgelig) decided to see if there was an easier, more open way to do the same things, and found the Terasic DE-10 board, a board pushed by Intel for development on the Altera Cyclone V SE FPGA. This is a more substantial FPGA than used on the MiST board, and it also contains a dual “hard core” ARM Cortex A9 processor.

Since the DE-10 is a development board, it lacks general purpose on-board I/O, but it’s got a large number of signals going off-board for add-on hardware. So MiSTer systems are built of a stack of add-on boards. There are about 40 computer system cores for the MiSTer on its GIT page, 15 game consoles, hardware for I/O boards, 3D printed cases, all open source.

Edu Arana has created several versions of the UnAmiga board, based on the Minimig… he sent me this one (sorry for photo, it’s just a smartphone snapshot).

Yet another new Amiga board is the Vampire 4 Stand-alone. For some years now, Apollo Accelerators has made CPU accelerator boards for classic Amigas. The trick there is that, rather than use a faster 680×0 processor, they used their own “soft-core” 68K-compatible processor, dubbed the Apollo 68080, which is typically 3x-4x faster than an MC68060 processor.

The V4SA is their first complete computer. The fastest Amiga I have used to date, and it’s powered from a USB power brick. In fact, they even added SIMD “multimedia” instructions to the 68K instruction set, allowing this processor to play back MPEG-4 video, something no hard-core 68K ever dreamt of.

There are also professionally made cases for most of these single boards, if the makers don’t supply their own. In late 2019, Stephen Jones sent me one of his “Checkmate 1500” cases. I didn’t have immediate use for it, but it was a clone of the Amiga 3000, my absolute favorite Amiga! So when it came time to build a work PC for our shore house, I put it in the Checkmate 1500 case.

It will directly take MicroATX and ITX cases, which covers some of the Amiga boards around. But it’s actually a very clever, modular design. My system has a Blu-ray drive, a USB and memory card reader in place of a floppy, etc. There are fitting kits for Commodore Amiga boards, etc.

Now Stephen has the Checkmate 1500 Mini, which is houses a mini-ITX board and a bunch of other variations of Amiga compatible hardware today.

And of course, as well as the original 68K-based AmigaOS 3.x, and the PowerPC AmigaOS 4.x, there’s an open source version, known as the Amiga Research Operating System. You can run AROS in a virtual machine on any old PC these days, if you’re interested.

Paolo Besser has built a really nice distro of AROS, called Icaros Desktop, which, as with Linux distros, collects a bunch of components from different open source projects and gets them all working nicely together. Links below.

You can also dump the hardware altogether — well, the Amiga-specific hardware — and run classic AmigaOS on your PC via numerous Amiga emulators. Some of these will work on tablets and smartphones, too. A popular “distro” for Amiga emulation is Cloanto’s “Amiga Forever” commercial product.

Welcome to the world of retrocomputing! One of the reasons that all of these new Amiga projects exist is the fact that interest in the Amiga systems never entirely died — but the original machines themselves do. But in fact, demand for older computer systems, at least the more popular ones, has grown in recent years, to the point that older machines are often fetching pretty crazy prices. So there’s a small market, oriented to serious hobbyists, for new hardware that runs the old operating systems.

Now, I know what you’re thinking: I’m typing this on my 16-core “Big PC” with 64GiB DRAM, 2TB PCIe SSD, dual GPUs, looking at three large screens (a total of over 8,000 pixels across), etc. I could probably fit every program ever written for Amigas… in RAM! Well, pretty close anyway.

I think part of the allure of these machines is, of course, nostalgia. But in part, it’s a better level of understanding and a different kind of computing. When I’m running a the Big PC, I’m writing, working in CAD, working on photos, working on music, etc. It’s all about the applications… and sure seems like “work” is involved quite a bit. But even for hobbies, the computer is a tool to enable those hobbies. Any computer will do as long as it runs my apps. I of course integrate my own — I’ve never bought a commercially made off-the-shelf desktop PC for myself. But even then, I just see them as tools. If one dies, the only pain I feel is in the wallet!

When folks bought personal computers in the 1970s and 1980s, they didn’t necessarily think about applications. Those did happen, but for many people, the hobby WAS the computer. May user completely mastered those computers, knowing every little bit about them. That was possible with the 8-bit generation, perhaps a bit less possible with more complex systems like the Amigas. But you could learn as much as you liked about any aspect of the system, in software, in hardware. In a modern PC, well, just how much do you understand about what’s going on in that nVidia RTX2070 GPU card?

Read More
History of the Amiga
Who bought Commodore – The Silicon Underground
What Ever Happened To Gateway?

The Cult of Amiga Is Bringing an Obsolete Computer Into the 21st Century
AMY ITX
Saving your true Amiga legacy
Minimig WARNING SPAMMY LINK “Grattis 50 miljonte Chrome-användaren”) – Open at your own risk: https://somuch.guru/minimig/
A-EON Technology Ltd
The A-EON Amiga X5000: An alternate universe where the Amiga platform never died
mist-devel/mist-board
MiSTer – The MAME of FPGA Simulation Projects
MiSTer-devel/Main_MiSTer
Apollo Accelerators
Checkmate A1500 Plus

Aros, winner of most interesting OS
AROS Research Operating System
http://www.icarosdesktop.org/
How to Emulate a Commodore Amiga on Your PC
Amiga Software, Emulation, Games, History and Support Since 1986

RetroRGB
The Impractical but Indisputable Rise of Retrocomputing

View More

I made a film that explains some of the reasons Commodore went under. Best watched with a few bottles of your favorite adult drink, a box of tissues, and your choice of Commodore management villain photos up on a handy cork-board. And darts, knives, or possibly hatchets.


This also relevant reply was written by Björn David Paulsen

Thanks for the A2A.

Today, when we speak of an Amiga, we usually mean one of three variants.

The first is the classic Amiga. This is the OCS, ECS and AGA systems manufactured from 1985 to 1996. It includes the Amiga (later named the Amiga 1000), the A500, the A2000, the A600, the A3000, the A500+, the A3000 and the A4000.

The second variant is the modern iteration. This is the AmigaOne series of PowerPC-based computers produced by Hyperion. Some purists refuse to call them proper Amiga computers, but they are part of the lineage, and they are still produced today. In embracing the PowerPC instruction set, however, these Amigas have abandoned binary compatibility with the classic systems, opting instead to run legacy apps via built-in OS emulation.

The third Amiga type is the Vampire series of Amiga accelerator boards. These are FPGA implemented boards that effectively integrate Amiga functionality, obviating the need for custom chipsets. The last one, the Vampire 4, is a standalone machine, and it is currently in production. It runs its own nonstandard (though largely binary compatible) implementation of the 68000 instruction set, meaning programs written for the classic machines largely can be made to work on the Vampire.

The classic models are, alas, no longer in factory production. However, there is significant refurbishment of old components into fresh machines. The most well-known of these is the ReAmiga project by John “Chucky” Hertell. ReAmiga produces refurbished, fully working Amiga machines from discarded boards. If you’re a purist when it comes to the Amiga lineage, this is probably your best bet for truly authentic hardware.

Further reading
A-EON Technology Ltd (AmigaOne)
Apollo Accelerators (Vampire)
Moving components from a dead A1200 to an ReAmiga 1200 (ReAmiga)

Simple four-way kickstart switch with M27C160

This post has been cloned from http://blog.system11.org/?p=2666
Originally written 15 Dec 2017
Some links and inline-notes, both displayed in red, has been added to this guide after cloning.

Amiga (various models) Kickstart switcher

The Amiga has had multiple firmware versions over the years, known as “Kickstart”. Unfortunately a lot of software that hits the hardware directly is affected by which version of Kickstart you’re using, leading to various hardware and software solutions.

The software ones (for example Relokick) do work, but if you have enough boot time toggles it can start getting unwieldy managing which things are resetting and why – for example booting into 68000 mode on your accelerator card, then booting Relokick to drop to Kickstart 1.3 which involves another reset. Hardware options are definitely the way to go.

There are some quite complex ones which allow you to switch on reset with keyboard strokes, but I found one main problem with these – they’re always out of stock. Additionally they only allow you to switch between two ROMs and have quite large physical footprints because for some reason people are really “purist” over Kickstart ROMs, copyright and so on meaning multiple chips or insane solutions like having to download original chips into onboard flash.

As many reading will know, I’m a member of The Dumping Union, so I don’t much care. So I made a small quad switcher board which anyone can make without having to worry about stock availability. It won’t work in all machines, if yours can cope with single 20 pin chips then you’ll be fine. This is revision 1.1, the 1.0 included a mistake which affected the logical workings of the jumpers.

So what we have is a 27C160 (16mbit) chip split into four areas by the jumpers toggling high address lines on the chip, presented to the motherboard as a standard 27C400. If you want to make life easier when you’re building this, solder the middle pin strip first, then the resistors, socket, other strip and header in that order. It should look a bit like this:

And it installs like this (photo taken in Rev 6 A2000):

As with my drive switcher project, I suggest you get the boards made by OHS Park, here’s a handy ordering link:
Order from OSH Park

However if you want to manufacture them yourself or make changes, here’s the Eagle CAD file:
A2000_ks_quad_11

Parts list:

1x 27C160 EEPROM
2x 20 way male pin strip, turned pin type
2x 4.7k ohm resistor 1/2 watt
1x 4 pin right angle pin header
1x 42 pin DIL socket
2x jumpers, switches, or 2P4T rotary switch (examples)

To make the image for this chip just get your four chosen ROM images, double the size of any 2mbit (256k) images and copy the lower half into the upper half, and then compile them into a single 16mbit image. There are loads of ways of doing this, I just used a Linux command line:

$ cat KICK13.ROM > quadbios.bin
$ cat kickstart2_04.rom >> quadbios.bin
$ cat Kickstart3.1.rom >> quadbios.bin
$ cat DiagROM >> quadbios.bin

As you can see I chose 1.3, 2.0, 3.1 and the awesome Amiga Diagnostic ROM (http://www.diagrom.com), once you have that image you will need to byte swap it if you’re using images used by emulators, but not if you’re using genuine chip dumps. As a sanity check when you load the file into your programmer software to burn the 27C160, look at the buffer – if you see readable headers instead of slightly scrambled ones, you’ll need to byte swap it. In fact it’s probably best to check the individual ROMs you plan to use before joining them together, that will work just as well.

As for how to actually use it – well that’s up to you. If you ground the second pin of J1 or J2 you’ll change which segment of the 27C160 is being accessed according to this table:

J1  J2
ON  ON  = ROM 1
OFF ON  = ROM 2
ON  OFF = ROM 3
OFF OFF = ROM 4

If you do this while the machine is running it will tend to crash horribly – but switching it during a reset seems to work, or by turning it off first. You could attach 2 toggle switches to it, or do as I have and wire up a 2 pole 4 throw switch – if wired correctly this will let you choose any of the 4 possible combinations. I used one of these:

So if you look at the above pinout, I connected J1-1 to A, J1-2 to 1 & 3, J2-1 to B, and J2-2 to 5 & 6.

You may not make these to sell unless you are charging a minimal amount for assembly and parts. Everything else is fine.

Burning Kickstart ROMs for the Amiga

(cloned from https://www.software-by-mabe.com/blog?3&catid=2)
Links and inline-notes, both displayed in red, has been added to this guide after cloning.
See also:
Burn Damn ROM Burn

Burning your own Amiga ROMs (EPROMs)

01/26/2019 | Amiga | Amiga ROM AmigaOS

With the release of the latest AmigaOS version (3.1.4) the package you could buy included ROM images to be used for either maprom (depending on your accelerator card tool support) or for burning it to a ROM.

Maprom is probably preferred, because it’s more flexible, but not always possible. For instance the A3440 card can’t do maprom. Or if you have no accelerator at all you can’t do maprom either.

Which leaves only a few options. Either you can buy the ROM, have someone burn it or burn it yourself.

Here I want to show how it works to burn it yourself.

What you need:

– an EPROM programmer. I have chosen the low cost GQ-4×4 USB programmer.

– to program the EPROMs used in an Amiga you have to get a 16-Bit 40/42 pin ZIF adapter board for the burner:
ADP-054 16 Bit EPROM 40/42 pin ZIF adapter

– an UV eraser, which can erase the EPROMs, in case something goes wrong.

– then you need EPROMs. The types used in A500/A600/A2000 are 27C400. I found the following to work which can be ordered in eBay: AMD27C400

– for burning ROMs for A1200/A4000 you need 27C800 / AMD27C800 roms, two of them to burn one ROM.

– and certainly a ROM image you want to burn.

Sometimes there are good offers at Amazon or eBay for a complete package (except the EPROMs).
You shouldn’t pay more than €150 for the GQ-4×4, the adapter board and the eraser.
(https://www.amazon.co.uk/gp/product/B011HVON3A/)

Here is a picture of the device with attached adapter board with an EPROM inside.
GQ programmer with adapter board and EPROM

Then you need to download the software for the burner. That is a) the burner software itself named “GQUSBprg”. The latest version as of this writing is 7.21.
And you need the USB driver 3.0.

Can be downloaded here: http://mcumall.com/store/device.html

When you connected the burner and installed the software we can start.
Now open the burner software. Make sure that there is no EPROM put in.

1. first step is to select the device, or the EPROM to burn.

Make sure you choose either AM27C400 or 27C400.

2. Next we’ll make a voltage check to see if the burner has all voltages in order to properly burn the EPROM.

I found that while you can attached a power supply on the burner it is not required. The USB provides enough power.

3. Load the ROM image into the buffer.

When you load the image make sure you choose .bin (binary).

!!! This is important, or otherwise the programmed ROM won’t work.
After you loaded the ROM image, you have to make sure to swap bytes.
This can be done in the ‘Command’ menu of the software.
Check first by selecting the “Buffer” tab. If you find some readable text in the beginning of the buffer, you need to byteswap it.

4. Now you have to put in your EPROM into the ZIF slot.

Make sure it sits tight and doesn’t move anymore.

5. Make a blank check to see if the EPROM is empty.

6. When the EPROM is blank we can write it.

When the write process is finished it’s done.

You can take out the EPROM and put it into the Amiga and it should work.

Some notes:
Partly this whole process of writing the ROM was a real pain because the GQ burner would just stop writing at some address. And in fact I had to get the package replaced including the adapter board.

I had first tried it in a virtual machine (VMware Fusion on Mac) but this doesn’t work for some reason as the GQ programmer detaches and re-attaches to the USB bus on some of the operations and that doesn’t seem to be working reliably in a VM.

Commenting on my own post:

The Amiga 4000 can only use 512k EPROMs, hence only 27C400 will work.
The Amiga 1200 can also use 27C800 (1MB).

The byte-swap, if your ROM image is already byte-swapped, then you don’t need to do this here.
Some ROM images, which are ready to burn have this already.
However, if you want to burn ROM images that are used in maprom or UAE, then you have to byte-swap.

07/15/2019 | Manfred |


Problems writing or verifying ROMs ?

If you get messages like Write failed, Address=0x000200, Buffer=0x40 Device=0x00 (or any other address or values), or if the verification fails after the ROM was written, you can try a few thing to remedy the problem:
* With the level on the ZIF for the ADP-054 adapter down, gently wiggle the adapter board up/down (on each of the pin rows) while holding it down so it doesn’t pop out.
* While inserting the EPROM in the adapter, hold the chip down and pull it towards you.
* Try another profile for the chip you are using. Usually, you should try the best match first, then go for the alternatives. If your ROMs are AM27C400, you can also try the M27C400 and 27C400 profiles (when I checked, the profiles were similar, the only difference beside their names was that the AM profile had voltage settings)
* Try decreasing the write speed from the default (+2) to 0 (zero).

Print a support bracket for the adapter

If you have a 3D-printer or have access to one, this support for the adapter is helpful in making the adapter not wiggling on the ZIF-socket, especially when inserting EPROMs in the outer sockets on the adapter.


https://www.printables.com/model/317538-gq-4×4-usb-programmer-adp-054-adapter-support-brac/files

Resources

Making a custom kickstart 3.9 ROM
Guide: Create and Burn a custom Kickstart 3.9
AmigaOS 3.9 Kickstart and Patches Guide
Classic Amiga Wiki – Kickstart 3.9
Help making Custom Kickstart rom
EEPROM on A1200?
Making a custom kickstart 3.1.4 ROM
Remus and ROMsplit to create your own 3.1.4 KS


https://www.youtube.com/watch?v=FfkGgCiu8sc

Willem EPROM programmer
GQ-4X User’s Manual
Software and USB-driver download
27C400 EPROMs (for A500/A600/A2000 and A4000 ?)
27C800 EPROMs (for A1200 only ?)

Partitioning 16 GB Compact Flash card with WinUAE and PFS3

Cloned from: https://16bitdust.wordpress.com/2015/10/13/partitioning-16-gb-compact-flash-card-with-winuae-and-pfs3/
See also: How to Setup an Amiga Compact Flash Drive using WinUAE [everythingamiga.com]

This article was cloned for archival purposes from the now defunct site 16bitdust.wordpress.com. The directions worked up to recently when WinUAE 4.x was released. Read through the helpful comments at the end on how to make this work for version 4.

Index, or quick links to the sections

Use these quick links if you know how to do some of the steps.

Partitioning 16 GB Compact Flash card with WinUAE and PFS3

(cloned content starts here)
Lately I’ve noticed a lot of questions on how to partition and prepare Compact Flash card (or HDD) for use with Amiga, so I’ve decided to write this tutorial on how to do it and format them as PFS3 partitions.

At least this is how I do it :). Using PC with WinUAE to prepare everything and just pop finished card in Amiga, ready to go.

Preparing Compact Flash card

Regardless if you’re going to do it with real Amiga or with WinUAE, first step is to prepare CF card. For Amiga to be able to use it we need to “clean” any file and partition structures that are present on the card. Luckily, there’s a tool included with windows to do just that, it’s called “diskpart”.

First thing first, connect your CF card to PC, it doesn’t matter how you do it. Integrated card reader, USB card reader, whatever you usually use.

Now we need to start Command Prompt with elevated permissions, aka “as Administrator”. If you have Windows 7 and UAC turned off applications start “as Administrator” by default, but I guess most people use default settings. Anyway, press Start key on keyboard (or click Start icon on taskbar), type “cmd” (without quotes of course, every command I have written with quotes is supposed to go without them, unless explicitly state otherwise). It should find either Command Prompt or cmd.exe, in my case (Windows 10) it was Command Prompt, but if I remember correctly on Windows 7 it says only cmd.exe. Regardless, right click it and choose “Run as administrator”.

Now type “diskpart” and press enter key

This will load diskpart. Now lets see what drives we have available, type “list disk” and press enter, this will list all disk drives that are present in your computer. Find the one representing your CF card. In my case it was 16 GB CF card so it’s the last one, where is says 14 GB. Note that it’s “Disk 5”.

To select it type “select disk #” where # is number your CF/HDD got, followed by enter of course. In my case it was “select disk 5”

You should get message that Disk # is now the selected disk. To make sure type “detail disk” and press enter

It will output details of currently selected disk. Double check you’ve selected the correct one. If you clean wrong disk it’s bye, bye data. After you’re sure you’re sure 🙂 type “clean” and press enter. You should get a message saying it’s been successfully cleaned. If there was some kind of error make sure you’ve started Command Prompt as administrator.

And that’s it for preparing your CF/HDD. You can check with “detail disk” and/or “list disk” (selected disk will get * sign in front of it) commands to see if it’s been cleaned.

Tools and preparation

To make it a bit easier I’ve prepared small pack of tools and file systems. Simply unzip them in folder and assign the folder as hard drive in WinUAE, we’ll get into more details a bit later. Inside the archive is

Diskmaster – Norton Commnder like file manager
HDInstTools
HDToolBox
loadmodule – command line tool, used for loading modules, we use it to load updated scsi.device that enables large hdd usage
Reboot – command line soft reset tool
CLI – Shell
scsi.device – doobrey’s pacthed scsi.device v44.20, I use it without problems with all my A600/A1200
FS folder – I’ve included few filesystems in this folder, few versions of FFS and latest (at the moment v18.5) PFS3 AIO, you can get newest version from aminet
scsi folder – Here I’ve included two scsi.device files I used so far. scsi.device.44.20 is the same one as above, scsi.device.43.45 is patched version of scsi.device 43.43 from WB3.9 BB2 update, reason I included it was because I had problems with 44.20 when used on regular A500 with KS3.1, for some reason it was crashing when it tried to load it, but this version, 43.45, worked fine. I guess it might be something to do with 68000 CPU, when I connected ACA500 with ACA1220 (68020 CPU) to this same A500 it worked fine with v44.20. So just in case, here are both versions.

PrepTools_v02.zip
Dropbox download (from article author)
Alternative download location (shared from my online storage)

WinUAE settings

We’re almost ready for actual work, almost :). First, run WinUAE as administrator, same as with command prompt. Find it’s shortcut (or WinUAE.exe), right click it and choose “Run as administrator”. This will allow WinUAE to access CF card, otherwise OS will block direct access to it.

To make it a bit faster I set WinUAE to emulate a bit beefier then standard Amiga. These are setting that I use for prepping CF cards, WB installations, file copying and so on. I saved it as config so I don’t have to set it up every time.

For ROM settings use Kickstart 3.0 or 3.1, whatever you usually use, for floppy settings mount either Workbench or WorkBench Install floppy (again, either 3.0 or 3.1, whatever you usually use) and set it to turbo speed (slider to maximum left), to speed up WorkBench load.

If you use Workbench floppy instead of Workbench install floppy you’ll get one warning from HDToolBox later on, nothing important, we’ll get to that later, doesn’t really matter.

Now go to HDD settings (CD & Hard drives) and click “Add Directory or Archive…” button

Browse to the folder you unpacked archive from previous chapter. For “Device name” and “Volume label” enter whatever you like. I simply enter “f” in those fields and I’ll use “f” throughout this tutorial. No special reason, that simply means that within workbench you’ll be able to find those files in drive “f”.

Now we need to add CF card to our virtual Amiga. Click “Add Hard Drive…” button, in new window click on the drop down menu and choose your drive.

Also, from drop down menu that says “UAE” choose “A600/A1200/A4000” and click “Add hard drive” button.

Finally, all preparation is done. All that’s left is to click “Start” button and load Workbench. You haven’t forgot to assign WB3.x floppy to floppy drive, have you?

Preparing the card

After it finishes loading you should get something like this

First thing we need to do is load patched scsi.device, original one is limited to 4GB and since our card is 16 GB we need to do something about it. If you’ll use 4 GB card you can skip this scsi.device thing, or if you use direct scsi enabled filesystem you can use up to 8 GB HDDs, like PFS3DS, but I prefer to use scsi.device approach even with 8 GB cards.

To load it we need to get to Shell. Since there’s no Shell on Workbench Install floppy I’ve included it in tools archive. Open drive “f” and you’ll find Shell there

Alternatively, if you used Workbench floppy to boot you can also find Shell in Workbench floppy, System drawer.

Switch to drive “f” by typing “f:”, followed by enter key, and finally type “loadmodule scsi.device” and press enter. This will load new scsi.device to memory and reboot our virtual Amiga. After it boots again, we can go back to shell and type “version scsi.device”, output should say version 44.20.

If you reboot from WinUAE (F12 and then “Reset” button) or stop/start emulation again, you’ll have to repeat this “loadmodule scsi.device” procedure, loadmodule survives only soft reset (ctrl + amiga + amiga, or reboot from command line, remember that Reboot file from zip archive?).

Now that we’ve loaded patched/updated scsi.device we can proceed. Open F drive, HDToolBox drawer and finally run HDToolBox.

HDToolBox should load and show one unknown drive. So let’s introduce them, click “Change Drive Type” button.

Click “Define New…”

And Finally “Read Configuration”, to get drive geometry information.

You’ll get one info dialog so just click Continue and you’ll get correct geometry values. Don’t mind Size negative size. That’s only visual, HDToolBox wasn’t meant for drives so big so they never bothered to use big variables, this is simple programming variable overflow, drive will be formatted correctly.

If you want to precisely set partition sizes you can use calculator I made, at bottom left there’s link to PDF on how to use it. You just need Cylinders, Heads and Block per Track values from this HDToolBox window.

Now just click “Ok” on this and next window.

If you used Workbench floppy to boot you’ll probably get warning complaining how it can’t find L:FastFileSystem, just click continue. Reason for this is that Workbench floppy doesn’t have FFS driver on it. It’s on Install floppy, where HDToolBox usually is so it can find it automatically. If you used Workbench install floppy to boot you’ll simply be back to starting HDToolBox window.

Now that we’re back at starting window, you’ll notice that all buttons have unlocked and that drive is no longer “unknown”. Click “Partition Drive” button

Add checkmark on “Advanced Options” checkbox

Edit “Partition Device Name” from UDH0 to DH0 (I guess it doesn’t matter, but traditionally HDD partitions are named DH0, DH1 and so on), and click on “Add/Update…” button.

Again, if you used Workbench floppy to boot, you wont’ have anything in the list. If you used Workbench install floppy you’ll have Fast File System loaded. If you don’t intend to use it, simply select it and click “Delete File System” button.

To add new file system click on “Add New File System…” button

And type path to file containing desired file system. In that zip file from beginning I’ve put them in FS folder and file name is pfs3_aio-handler, so in this case I typed “f:fs/pfs3_aio-handler”, and click “Ok” button.

Now we need to enter DosType for PFS3, for PFS3 it’s

0x50465303

For PFS3DS aka PDS3 DosType would be 0x50445303 (pfs3_aio-handler supports PDS3, you just need to type this instead of PFS3 one, everything else is the same) and FFS would use 0x444F5301, just for info.

You can leave “Version” and “Revision” fields at default values, sometimes I edit “Revision” to 5 since this is PFS3 v18.5 but it’s not like it really matters. Again, click “Ok” button.

Now we have PFS3 loaded. We can load more filesystems, I’ve included few FFS versions in FS folder. When I started with Amigas few years ago I usually used FFS for DH0 and PFS3 for DH1, but actually there’s not much point to it, PFS3 is better (more modern) than FFS, and OS had to load two drivers so that resulted in a bit more memory used.

Now to set the partition up. I’ve resized it to 500 MB. You can do this via partition slider, which is unprecise, or by directly entering Start Cyl and End Cyl values. Which is what I did. To get those values you can use calculator I mentioned earlier. Finally, click on “Change…” button.

First click on “File System:” block thingy until it says “PFS\03” and then edit MaxTransfer value to 0x1fe00 (these are zeroes, not “O”s) AND PRESS ENTER TO CONFIRM THE VALUE. This is a “feature” on this window, if you enter the value and click “Ok” it will not apply but revert to original value. You have to press enter and then click “Ok” button.

Now set second partition to size you want. I usually use all of the rest of space for it, you can simply stretch it, no need to be precise for that. And repeat last step on it (Change…, File System, MaxTransfer). After you’re done with both (or more) partitions click “Ok” button to return to main HDToolBox window. All that’s left is to click “Save Changes to Drive” button. Only visible difference will be drive status, it will change from “Changed” to “Not Changed”.

Exit HDToolBox and reboot. In some rare occasions new partitions appeared immediately after I saved changes in HDToolBox, but in 90% of cases they didn’t. After reboot they appeared.

Easiest way is to double click Reboot icon that should be in “F” folder so do it. Or open shell again, go to drive “F” and type “reboot” followed by enter. But double clicking Reboot icon is faster/easier.

If you reboot from WinUAE control panel, you’ll have to do that “loadmodule scsi.device” thingy again. Alternative is to reboot via keyboard shortcut (Ctrl + Amiga + Amiga).

After reboot you may have to wait few seconds (3-5) for partitions to appear. But they should appear.

Select first one (DH0), press right mouse button and go to toolbar at the top, choose “Icons” and “Format Disk…”


Enter name you want your drive to have, like System, Main, Workbench… whatever, uncheck “Put Trashcan” checkbox if you want (I uncheck it) and click on “Quick Format” button. This is a must when using flash media like CF cards.

You’ll get two warnings asking you if you’re sure you want to format it, click “Format” button on both dialogs.

Lastly you’ll get one more dialog, simply informing you about some PFS3 info, click “Ok” and wait a bit for format to complete.

Repeat for second (and all consecutive ones if you made them) partition, this one might take 30-60 seconds to complete as it’s quite a bit larger. After it’s done you’ll have two partitions, 500 MB and 14+ GB formatted as PFS3.

Now you can install Workbench on it. But remember, if you make hard reset you’ll have to manually load patched scsi.device again, BEFORE you make any change to filesystem. Usually first partition will be accessible since it’s 500 MB, but DH1 will be NDOS again until you load scsi.device.

If you install Classic Workbench you can simply copy this scsi.device to DH0:DEVS folder, it will load it automatically on boot. If you install “plain” Workbench you’ll have to manually add it to startup-sequence. Tutorial on how to do this is here.

Just be sure to use same scsi.device you used to when partitioning the drive. There are more than one, others might work, but they may also result in corrupted data.

Create a bootable USB-disk for installations and tools using .iso images

The Acronis way

This method uses Grub4Dos and standard windows/dos utilities. Works only for smaller images (less than 2GB) and only for Legacy boot (not UEFI). See links at the end of the article for other methods.

Cloned from: https://kb.acronis.com/content/57232

Downloading grub4dos

Download grub4dos utility and grub installer to your computer and unpack them.
Currently, the latest version of grub4dos is grub4dos-0.4.4.zip and the latest version of grub installer is grubinst-1.1-bin-w32-2008-01-01.zip.

Making USB bootable

1. In Windows Explorer, open the installer’s folder and select grubinst_gui.exe:

2. Run the application:
Windows XP: Double-click grubinst_gui.exe
Windows 7 or later: Right-click grubinst_gui.exe and select Run as administrator:

3. Select Disk, then click Refresh and select the drive you want to create a bootable media on:

You can detect your drive by its size. In this example an 8GB flash drive is used.

3. In Part List click Refresh.

4. From the dropdown box select Whole disk (MBR):

5. Check the Don’t search floppy option, leave all the other options unchecked:

6. Click Install.
If the installation completes successfully, you will see this message:

7. Press Enter.

8. In Windows Explorer open the grub4dos folder, locate grldr and copy it to the target drive:

Creating ISO files of Acronis products

  1. Run the media builder of Acronis True Image.
  2. Select ISO file when offered to choose media destination:
  3. Create the ISO. You can save the ISO file directly to your flash drive or copy in later.
  4. Run the media builder of Acronis Disk Director.
  5. Select ISO file when offered to choose media destination:
  6. Create the ISO. You can save the ISO file directly to your flash drive or copy in later.

Setting up multiproduct boot

  1. Copy the ISO files to the flash drive if you haven’t done it yet. Now you should have 3 files on the drive:
  2. Open Notepad.
  3. Insert this content:
    timeout 10
    default 0title Acronis Disk Director
    map –mem –heads=0 –sectors-per-track=0 (hd0,0)/<DiskDirector>.iso (hd32)
    map –hook
    chainloader (hd32)
    boot

    title Acronis True Image
    map –mem –heads=0 –sectors-per-track=0 (hd0,0)/<TrueImage>.iso (hd32)
    map –hook
    chainloader (hd32)
    boot

    title CommandLine
    commandline

    title Reboot
    reboot

    title Halt
    halt

where <DiskDirector> is the name of the ISO file created in Acronis Disk Director and <TrueImage> is the ISO file created with Acronis True Image.

4. Save the file as menu.lst to the root directory of your flash drive. In Save as type select All files, otherwise the file might be saved as a .txt-file while we need a .lst-file.

You can double-check the file extention in Windows Explorer:

If you don’t see the extention, check this article for help.

Now your USB drive is ready and you can boot your computer with it.

Other methods

YUMI – Multiboot USB Creator

Ventoy – A New Bootable USB Solution

Recommended tools to put on the USB-drive

MiniTool Partition Wizard

The best partition manager
Version 9 and 9.1 is downloadable from here: http://www.it.nrru.ac.th/download/utilities/ (140MB)

HDClone

HDClone 6 Free Edition

Trinity Rescue Kit

Trinity Rescue Kit

Creating a bootable USB stick for Windows installation using diskpart

For the other way around, creating a bootable ISO from a USB:
https://aatayyab.wordpress.com/2016/05/09/convert-bootable-usb-to-an-iso-image/
might also be useful: https://www.dell.com/community/Windows-10/Windows-10-rebootable-iso/td-p/5030000

Cloned from: https://blog.bramp.net/post/2008/06/23/create-bootable-windows-server-2008-usb-stick/

Start diskpart

DISKPART> list disk

     Select the USB device from the list and substitute the disk number below
     when necessary

DISKPART> select disk 1
DISKPART> clean
DISKPART> create partition primary
DISKPART> select partition 1
DISKPART> active
DISKPART> format fs=fat32
DISKPART> assign
DISKPART> exit

xcopy X:\*.* /s/e/f Y:\

     where X:\ is your mounted image or physical DVD and Y:\ is your USB
     device

Diskpart info: http://www.computerhope.com/diskpart.htm
See also: USB install media with WIM file larger than 4GB