Buffalo LS220D – lost drive (hiccup)

Yesterday I noticed that the LEDs were blinking amber on one of my LS220D boxes. My initial thought was that a disk had failed (it’s just a backup of my backup). Checked with the “NAS Navigator” application, and it stated that it was unable to mount the data array (md10) (I have not logged the full error message here, as I continued the attempts to solve the situation).

dmesg output

I logged in as root (see other posts) to check what had gone wrong.
‘dmesg’ revealed that a disk had been lost during smartctl (multiple repeats of the below content):

program smartctl is using a deprecated SCSI ioctl, please convert it to SG_IO
Unable to handle kernel NULL pointer dereference at virtual address 000000a4
pgd = c27d4000
[000000a4] *pgd=0fe93831, *pte=00000000, *ppte=00000000
Internal error: Oops: 817 [#50]
Modules linked in: usblp usb_storage ohci_hcd ehci_hcd xhci_hcd usbcore usb_common
CPU: 0    Tainted: G      D       (3.3.4 #1)
PC is at sg_scsi_ioctl+0xe0/0x374
LR is at sg_scsi_ioctl+0xcc/0x374
pc : []    lr : []    psr: 60000013
sp : cafb5d58  ip : 00000000  fp : 00000024
r10: 00000006  r9 : c41d1860  r8 : 00000012
r7 : 00000000  r6 : 00000024  r5 : beee5550  r4 : beee5548
r3 : cafb4000  r2 : cafb5d58  r1 : 00000000  r0 : 00000000
Flags: nZCv  IRQs on  FIQs on  Mode SVC_32  ISA ARM  Segment user
Control: 10c5387d  Table: 027d4019  DAC: 00000015
Process smartctl (pid: 1027, stack limit = 0xcafb42e8)
Stack: (0xcafb5d58 to 0xcafb6000)
5d40:          c057c2b8 60000013
5d60: c21f27f0 beee5548 c2274800 0000005d cafb5de4 00000000 c998edcc 00000004
5d80: c99800c8 c00a6e64 c9d034e0 00000028 c998edc8 00000029 c27d4000 c00a8fc0
5da0: 00000000 00000000 00000000 c998ed08 c2274800 56e6994b beee5a48 beee5548
5dc0: 0000005d 0000005d c2274800 c21f27f0 cafb4000 56e6994b beee7e34 beee5548
5de0: 0000005d 0000005d c2274800 c21f27f0 cafb4000 ffffffed beee7e34 c0245494
5e00: 00000053 fffffffd 00002006 00000024 beee5af8 beee5ae0 beee5ab8 00004e20
5e20: 00000000 00000000 00000000 00000000 00000000 00000000 00000000 00000000
5e40: c27d4000 00000000 c27d4000 cb0023e0 c87f3d30 00000028 beee7e34 c00be67c
5e60: c27d4000 00000028 cafb5fb0 56e6994b 00000001 0000005d c8014040 beee5548
5e80: 0000005d c0245530 beee5548 0000005d 00000001 00000001 beee5548 c222c000
5ea0: c8014040 c02a6284 beee5548 beee5548 c8014040 c2274800 00000001 0000005d
5ec0: 00000000 c02422a0 beee5548 c0242be0 00000000 cafb5f78 00000001 c2949000
5ee0: ffffff9c c8014040 00000000 00000007 c054ff34 00039db8 cafb5fb0 beee5548
5f00: c21e0470 00000003 00000003 c000e3c8 cafb4000 00000000 beee7e34 c00e0060
5f20: 00000000 00000000 cf34be00 2c1b812a 5e6a6136 2c1b812a cf1a2548 00000000
5f40: 00000000 00000000 00000003 00000003 c95a2ec0 c2949000 c95a2ec8 00000020
5f60: 00000003 c95a2ec0 beee5548 00000001 00000003 c000e3c8 cafb4000 00000000
5f80: beee7e34 c00e010c 00000003 00000000 beee5548 beee5548 0006d614 beee5a8c
5fa0: 00000036 c000e200 beee5548 0006d614 00000003 00000001 beee5548 00000000
5fc0: beee5548 0006d614 beee5a8c 00000036 00000000 00000003 00000006 beee7e34
5fe0: beee5ae0 beee5540 00039688 b6da5cec 80000010 00000003 cfcfcfcf 00000014
[] (sg_scsi_ioctl+0xe0/0x374) from [] (scsi_cmd_ioctl+0x39c/0x3fc)
[] (scsi_cmd_ioctl+0x39c/0x3fc) from [] (scsi_cmd_blk_ioctl+0x3c/0x44)
[] (scsi_cmd_blk_ioctl+0x3c/0x44) from [] (sd_ioctl+0x8c/0xb8)
[] (sd_ioctl+0x8c/0xb8) from [] (__blkdev_driver_ioctl+0x20/0x28)
[] (__blkdev_driver_ioctl+0x20/0x28) from [] (blkdev_ioctl+0x670/0x6c0)
[] (blkdev_ioctl+0x670/0x6c0) from [] (do_vfs_ioctl+0x49c/0x514)
[] (do_vfs_ioctl+0x49c/0x514) from [] (sys_ioctl+0x34/0x58)
[] (sys_ioctl+0x34/0x58) from [] (ret_fast_syscall+0x0/0x30)
Code: e1a0200d e7d3a2a8 e3c23d7f e3c3303f (e1c0aab4)
---[ end trace 660c9d3c9b4a9034 ]---

fdisk output

Using ‘fdisk’ (incorrect for this NAS), I listed the partitions on /dev/sda and /dev/sdb (nothing about /dev/sda):

[root@BUFFALO-4 ~]# fdisk -l /dev/sda
[root@BUFFALO-4 ~]# fdisk -l /dev/sdb

WARNING: GPT (GUID Partition Table) detected on '/dev/sdb'! The util fdisk doesn't support GPT. Use GNU Parted.

Disk /dev/sdb: 4000.8 GB, 4000787030016 bytes
255 heads, 63 sectors/track, 486401 cylinders, total 7814037168 sectors
Units = sectors of 1 * 512 = 512 bytes
Sector size (logical/physical): 512 bytes / 4096 bytes
I/O size (minimum/optimal): 4096 bytes / 4096 bytes
Disk identifier: 0x00000000

   Device Boot      Start         End      Blocks   Id  System
/dev/sdb1               1  4294967295  2147483647+  ee  GPT
Partition 1 does not start on physical sector boundary.

smartctl output

[root@BUFFALO-4 ~]# smartctl --scan
/dev/sda -d scsi # /dev/sda, SCSI device
/dev/sdb -d scsi # /dev/sdb, SCSI device

[root@BUFFALO-4 ~]# smartctl --all /dev/sda
smartctl 6.3 2014-07-26 r3976 [armv7l-linux-3.3.4] (local build)
Copyright (C) 2002-14, Bruce Allen, Christian Franke, www.smartmontools.org

Segmentation fault

[root@BUFFALO-4 ~]# smartctl --all /dev/sdb
smartctl 6.3 2014-07-26 r3976 [armv7l-linux-3.3.4] (local build)
Copyright (C) 2002-14, Bruce Allen, Christian Franke, www.smartmontools.org

=== START OF INFORMATION SECTION ===
Model Family:     Western Digital Caviar Green (AF, SATA 6Gb/s)
Device Model:     WDC WD40EZRX-22SPEB0
Serial Number:    WD-WCC4E1UUZH74
LU WWN Device Id: 5 0014ee 2b768eeb4
Firmware Version: 80.00A80
User Capacity:    4,000,787,030,016 bytes [4.00 TB]
Sector Sizes:     512 bytes logical, 4096 bytes physical
Rotation Rate:    5400 rpm
Device is:        In smartctl database [for details use: -P show]
ATA Version is:   ACS-2 (minor revision not indicated)
SATA Version is:  SATA 3.0, 6.0 Gb/s (current: 3.0 Gb/s)
Local Time is:    Thu Jul 14 12:10:33 2022 CEST
SMART support is: Available - device has SMART capability.
SMART support is: Enabled

=== START OF READ SMART DATA SECTION ===
SMART overall-health self-assessment test result: PASSED

General SMART Values:
Offline data collection status:  (0x82) Offline data collection activity
          was completed without error.
          Auto Offline Data Collection: Enabled.
Self-test execution status:      (   0) The previous self-test routine completed
          without error or no self-test has ever
          been run.
Total time to complete Offline
data collection: (52320) seconds.
Offline data collection
capabilities:     (0x7b) SMART execute Offline immediate.
          Auto Offline data collection on/off support.
          Suspend Offline collection upon new
          command.
          Offline surface scan supported.
          Self-test supported.
          Conveyance Self-test supported.
          Selective Self-test supported.
SMART capabilities:            (0x0003) Saves SMART data before entering
          power-saving mode.
          Supports SMART auto save timer.
Error logging capability:        (0x01) Error logging supported.
          General Purpose Logging supported.
Short self-test routine
recommended polling time:        (   2) minutes.
Extended self-test routine
recommended polling time:        ( 523) minutes.
Conveyance self-test routine
recommended polling time:        (   5) minutes.
SCT capabilities:              (0x7035) SCT Status supported.
          SCT Feature Control supported.
          SCT Data Table supported.

SMART Attributes Data Structure revision number: 16
Vendor Specific SMART Attributes with Thresholds:
ID# ATTRIBUTE_NAME          FLAG     VALUE WORST THRESH TYPE      UPDATED  WHEN_FAILED RAW_VALUE
  1 Raw_Read_Error_Rate     0x002f   200   200   051    Pre-fail  Always       -       0
  3 Spin_Up_Time            0x0027   196   187   021    Pre-fail  Always       -       7183
  4 Start_Stop_Count        0x0032   100   100   000    Old_age   Always       -       36
  5 Reallocated_Sector_Ct   0x0033   200   200   140    Pre-fail  Always       -       0
  7 Seek_Error_Rate         0x002e   200   200   000    Old_age   Always       -       0
  9 Power_On_Hours          0x0032   055   054   000    Old_age   Always       -       33525
 10 Spin_Retry_Count        0x0032   100   253   000    Old_age   Always       -       0
 11 Calibration_Retry_Count 0x0032   100   253   000    Old_age   Always       -       0
 12 Power_Cycle_Count       0x0032   100   100   000    Old_age   Always       -       36
192 Power-Off_Retract_Count 0x0032   200   200   000    Old_age   Always       -       28
193 Load_Cycle_Count        0x0032   001   001   000    Old_age   Always       -       7866202
194 Temperature_Celsius     0x0022   113   103   000    Old_age   Always       -       39
196 Reallocated_Event_Count 0x0032   200   200   000    Old_age   Always       -       0
197 Current_Pending_Sector  0x0032   200   200   000    Old_age   Always       -       0
198 Offline_Uncorrectable   0x0030   200   200   000    Old_age   Offline      -       0
199 UDMA_CRC_Error_Count    0x0032   200   200   000    Old_age   Always       -       0
200 Multi_Zone_Error_Rate   0x0008   200   200   000    Old_age   Offline      -       1

SMART Error Log Version: 1
No Errors Logged

SMART Self-test log structure revision number 1
Num  Test_Description    Status   Remaining  LifeTime(hours)  LBA_of_first_error
# 1  Short offline       Completed without error       00%         8         -

SMART Selective self-test log data structure revision number 1
 SPAN  MIN_LBA  MAX_LBA  CURRENT_TEST_STATUS
    1        0        0  Not_testing
    2        0        0  Not_testing
    3        0        0  Not_testing
    4        0        0  Not_testing
    5        0        0  Not_testing
Selective self-test flags (0x0):
  After scanning selected spans, do NOT read-scan remainder of disk.
If Selective self-test is pending on power-up, resume after 0 minute delay.

Nothing more to do than to reboot.

After reboot

The storage array was still not mounted, smartctl could now find /dev/sda:

[root@BUFFALO-4 ~]# df -h
Filesystem Size      Used Available Use% Mounted on
udev      10.0M         0     10.0M   0% /dev
/dev/md1   4.7G    766.8M      3.7G  17% /
tmpfs    121.1M     84.0K    121.0M   0% /tmp
/dev/ram1 15.0M    100.0K     14.9M   1% /mnt/ram
/dev/md0 968.7M    216.4M    752.2M  22% /boot

[root@BUFFALO-4 ~]# smartctl --all /dev/sda
smartctl 6.3 2014-07-26 r3976 [armv7l-linux-3.3.4] (local build)
Copyright (C) 2002-14, Bruce Allen, Christian Franke, www.smartmontools.org

=== START OF INFORMATION SECTION ===
Model Family:     Western Digital Caviar Green (AF, SATA 6Gb/s)
Device Model:     WDC WD40EZRX-22SPEB0
Serial Number:    WD-WCC4E1XUDU4T
LU WWN Device Id: 5 0014ee 20cbde2d7
Firmware Version: 80.00A80
User Capacity:    4,000,787,030,016 bytes [4.00 TB]
Sector Sizes:     512 bytes logical, 4096 bytes physical
Rotation Rate:    5400 rpm
Device is:        In smartctl database [for details use: -P show]
ATA Version is:   ACS-2 (minor revision not indicated)
SATA Version is:  SATA 3.0, 6.0 Gb/s (current: 3.0 Gb/s)
Local Time is:    Thu Jul 14 12:13:56 2022 CEST
SMART support is: Available - device has SMART capability.
SMART support is: Enabled

=== START OF READ SMART DATA SECTION ===
SMART overall-health self-assessment test result: PASSED

General SMART Values:
Offline data collection status:  (0x84) Offline data collection activity
          was suspended by an interrupting command from host.
          Auto Offline Data Collection: Enabled.
Self-test execution status:      (   0) The previous self-test routine completed
          without error or no self-test has ever
          been run.
Total time to complete Offline
data collection: (52560) seconds.
Offline data collection
capabilities:     (0x7b) SMART execute Offline immediate.
          Auto Offline data collection on/off support.
          Suspend Offline collection upon new
          command.
          Offline surface scan supported.
          Self-test supported.
          Conveyance Self-test supported.
          Selective Self-test supported.
SMART capabilities:            (0x0003) Saves SMART data before entering
          power-saving mode.
          Supports SMART auto save timer.
Error logging capability:        (0x01) Error logging supported.
          General Purpose Logging supported.
Short self-test routine
recommended polling time:        (   2) minutes.
Extended self-test routine
recommended polling time:        ( 526) minutes.
Conveyance self-test routine
recommended polling time:        (   5) minutes.
SCT capabilities:              (0x7035) SCT Status supported.
          SCT Feature Control supported.
          SCT Data Table supported.

SMART Attributes Data Structure revision number: 16
Vendor Specific SMART Attributes with Thresholds:
ID# ATTRIBUTE_NAME          FLAG     VALUE WORST THRESH TYPE      UPDATED  WHEN_FAILED RAW_VALUE
  1 Raw_Read_Error_Rate     0x002f   200   200   051    Pre-fail  Always       -       0
  3 Spin_Up_Time            0x0027   250   204   021    Pre-fail  Always       -       4500
  4 Start_Stop_Count        0x0032   100   100   000    Old_age   Always       -       38
  5 Reallocated_Sector_Ct   0x0033   200   200   140    Pre-fail  Always       -       0
  7 Seek_Error_Rate         0x002e   200   200   000    Old_age   Always       -       0
  9 Power_On_Hours          0x0032   053   051   000    Old_age   Always       -       34713
 10 Spin_Retry_Count        0x0032   100   253   000    Old_age   Always       -       0
 11 Calibration_Retry_Count 0x0032   100   253   000    Old_age   Always       -       0
 12 Power_Cycle_Count       0x0032   100   100   000    Old_age   Always       -       38
192 Power-Off_Retract_Count 0x0032   200   200   000    Old_age   Always       -       30
193 Load_Cycle_Count        0x0032   001   001   000    Old_age   Always       -       7823449
194 Temperature_Celsius     0x0022   122   106   000    Old_age   Always       -       30
196 Reallocated_Event_Count 0x0032   200   200   000    Old_age   Always       -       0
197 Current_Pending_Sector  0x0032   200   200   000    Old_age   Always       -       13
198 Offline_Uncorrectable   0x0030   200   200   000    Old_age   Offline      -       11
199 UDMA_CRC_Error_Count    0x0032   200   200   000    Old_age   Always       -       0
200 Multi_Zone_Error_Rate   0x0008   200   200   000    Old_age   Offline      -       14

SMART Error Log Version: 1
No Errors Logged

SMART Self-test log structure revision number 1
Num  Test_Description    Status   Remaining  LifeTime(hours)  LBA_of_first_error
# 1  Short offline       Completed without error       00%         8         -

SMART Selective self-test log data structure revision number 1
 SPAN  MIN_LBA  MAX_LBA  CURRENT_TEST_STATUS
    1        0        0  Not_testing
    2        0        0  Not_testing
    3        0        0  Not_testing
    4        0        0  Not_testing
    5        0        0  Not_testing
Selective self-test flags (0x0):
  After scanning selected spans, do NOT read-scan remainder of disk.
If Selective self-test is pending on power-up, resume after 0 minute delay.

Partition table after reboot

Now when both disks are in place again, I ran the (correct) command to list the partitions on all drives:

[root@BUFFALO-4 ~]# parted -l /dev/sdb
Model: ATA WDC WD40EZRX-22S (scsi)
Disk /dev/sda: 4001GB
Sector size (logical/physical): 512B/4096B
Partition Table: gpt
Disk Flags:

Number  Start   End     Size    File system  Name     Flags
 1      17.4kB  1024MB  1024MB  ext3         primary
 2      1024MB  6144MB  5119MBprimary
 3      6144MB  6144MB  394kB primary  bios_grub
 4      6144MB  6144MB  512B  primary
 5      6144MB  7168MB  1024MBprimary
 6      7168MB  3992GB  3985GBprimary


Model: ATA WDC WD40EZRX-22S (scsi)
Disk /dev/sdb: 4001GB
Sector size (logical/physical): 512B/4096B
Partition Table: gpt
Disk Flags:

Number  Start   End     Size    File system  Name     Flags
 1      17.4kB  1024MB  1024MB  ext3         primary
 2      1024MB  6144MB  5119MBprimary
 3      6144MB  6144MB  394kB primary  bios_grub
 4      6144MB  6144MB  512B  primary
 5      6144MB  7168MB  1024MBprimary
 6      7168MB  3992GB  3985GBprimary

...

Looks ok, so I tried mounting /dev/md10:

root@BUFFALO-4 ~]# mount /dev/md10 /mnt/array1/
[root@BUFFALO-4 ~]# df -h
Filesystem Size      Used Available Use% Mounted on
udev      10.0M         0     10.0M   0% /dev
/dev/md1   4.7G    766.8M      3.7G  17% /
tmpfs    121.1M     84.0K    121.0M   0% /tmp
/dev/ram1 15.0M    100.0K     14.9M   1% /mnt/ram
/dev/md0 968.7M    216.4M    752.2M  22% /boot
/dev/md10  7.2T      5.7T      1.6T  79% /mnt/array1
[root@BUFFALO-4 ~]# ls /mnt/array1/
backup/         buffalo_fix.sh* share/          spool/
[root@BUFFALO-4 ~]# ls /mnt/array1/share/
acp_commander/    buff4_public.txt  buff4_share.txt   buff4_web.txt

Checking the file system for errors

As I was able to mount the partition, I did a file system check after unmounting it:

[root@BUFFALO-4 ~]# xfs_repair /dev/md10
Phase 1 - find and verify superblock...
Not enough RAM available for repair to enable prefetching.
This will be _slow_.
You need at least 1227MB RAM to run with prefetching enabled.
Phase 2 - using internal log
        - zero log...
        - scan filesystem freespace and inode maps...
        - found root inode chunk
Phase 3 - for each AG...
        - scan and clear agi unlinked lists...
        - process known inodes and perform inode discovery...
        - agno = 0
        - agno = 1
...
        - agno = 30
        - agno = 31
        - process newly discovered inodes...
Phase 4 - check for duplicate blocks...
        - setting up duplicate extent list...
        - check for inodes claiming duplicate blocks...
        - agno = 0
        - agno = 1
...
        - agno = 30
        - agno = 31
Phase 5 - rebuild AG headers and trees...
        - reset superblock...
Phase 6 - check inode connectivity...
        - resetting contents of realtime bitmap and summary inodes
        - traversing filesystem ...
doubling cache size to 1024
        - traversal finished ...
        - moving disconnected inodes to lost+found ...
Phase 7 - verify and correct link counts...
done
[root@BUFFALO-4 ~]# mount /dev/md10 /mnt/array1
[root@BUFFALO-4 ~]# ls /mnt/array1/
backup/         buffalo_fix.sh* share/          spool/

Another reboot, then checking to find out that md10 was still not mounted.
The error in NAS Navigator is: “E14:RAID array 1 could not be mounted. (2022/07/14 12:36:18)”

Time to check ‘dmesg’ again:

md/raid1:md2: active with 1 out of 2 mirrors
md2: detected capacity change from 0 to 1023410176
md: md1 stopped.
md: bind
md/raid1:md1: active with 1 out of 2 mirrors
md1: detected capacity change from 0 to 5114888192
md: md0 stopped.
md: bind
md/raid1:md0: active with 1 out of 2 mirrors
md0: detected capacity change from 0 to 1023868928
 md0: unknown partition table
kjournald starting.  Commit interval 5 seconds
EXT3-fs (md0): using internal journal
EXT3-fs (md0): mounted filesystem with writeback data mode
 md1: unknown partition table
kjournald starting.  Commit interval 5 seconds
EXT3-fs (md1): using internal journal
EXT3-fs (md1): mounted filesystem with writeback data mode
kjournald starting.  Commit interval 5 seconds
EXT3-fs (md1): using internal journal
EXT3-fs (md1): mounted filesystem with writeback data mode
 md2: unknown partition table
Adding 999420k swap on /dev/md2.  Priority:-1 extents:1 across:999420k
kjournald starting.  Commit interval 5 seconds
EXT3-fs (md0): using internal journal
EXT3-fs (md0): mounted filesystem with writeback data mode

The above shows that md0, md1 and md2 went up, but are missing its mirror partition (this from /dev/sda that disappeared).
Further down in dmesg output

md: md10 stopped.
md: bind
md: bind
md/raid0:md10: md_size is 15565748224 sectors.
md: RAID0 configuration for md10 - 1 zone
md: zone0=[sda6/sdb6]
      zone-offset=         0KB, device-offset=         0KB, size=7782874112KB

md10: detected capacity change from 0 to 7969663090688
 md10: unknown partition table
XFS (md10): Mounting Filesystem
XFS (md10): Ending clean mount
XFS (md10): Quotacheck needed: Please wait.
XFS (md10): Quotacheck: Done.
udevd[3963]: starting version 174
md: cannot remove active disk sda6 from md10 ...
[root@BUFFALO-4 ~]# mount /dev/md10 /mnt/array1/
[root@BUFFALO-4 ~]# ls -l /mnt/array1/
total 4
drwxrwxrwx    3 root     root            21 Dec 14  2019 backup/
-rwx------    1 root     root           571 Oct 14  2018 buffalo_fix.sh*
drwxrwxrwx    3 root     root            91 Sep 16  2019 share/
drwxr-xr-x    2 root     root             6 Oct 21  2016 spool/

What the h… “cannot remove active disk sda6 from md10”

Checking md raid status

[root@BUFFALO-4 ~]# cat /proc/mdstat
Personalities : [linear] [raid0] [raid1] [raid10] [raid6] [raid5] [raid4]
md10 : active raid0 sda6[0] sdb6[1]
      7782874112 blocks super 1.2 512k chunks

md0 : active raid1 sdb1[1]
      999872 blocks [2/1] [_U]

md1 : active raid1 sdb2[1]
      4995008 blocks super 1.2 [2/1] [_U]

md2 : active raid1 sdb5[1]
      999424 blocks super 1.2 [2/1] [_U]

unused devices: 
[root@BUFFALO-4 ~]# mdadm --detail /dev/md10
/dev/md10:
        Version : 1.2
  Creation Time : Fri Oct 21 15:58:46 2016
     Raid Level : raid0
     Array Size : 7782874112 (7422.33 GiB 7969.66 GB)
   Raid Devices : 2
  Total Devices : 2
    Persistence : Superblock is persistent

    Update Time : Fri Oct 21 15:58:46 2016
          State : clean
 Active Devices : 2
Working Devices : 2
 Failed Devices : 0
  Spare Devices : 0

     Chunk Size : 512K

           Name : LS220D896:10
           UUID : 5ed0c596:60b32df6:9ac4cd3a:59c3ddbc
         Events : 0

    Number   Major   Minor   RaidDevice State
       0       8        6        0      active sync   /dev/sda6
       1       8       22        1      active sync   /dev/sdb6

So here, md10 is fully working and md0, md1 and md2 are missing their second device. Simple to correct, just adding them back:

[root@BUFFALO-4 ~]# mdadm --manage /dev/md0 --add /dev/sda1
mdadm: added /dev/sda1
[root@BUFFALO-4 ~]# mdadm --manage /dev/md1 --add /dev/sda2
mdadm: added /dev/sda2
[root@BUFFALO-4 ~]# mdadm --manage /dev/md2 --add /dev/sda5
mdadm: added /dev/sda5
[root@BUFFALO-4 ~]# cat /proc/mdstat
Personalities : [linear] [raid0] [raid1] [raid10] [raid6] [raid5] [raid4]
md10 : active raid0 sda6[0] sdb6[1]
      7782874112 blocks super 1.2 512k chunks

md0 : active raid1 sda1[0] sdb1[1]
      999872 blocks [2/2] [UU]
      bitmap: 0/1 pages [0KB], 65536KB chunk

md1 : active raid1 sda2[2] sdb2[1]
      4995008 blocks super 1.2 [2/1] [_U]
      [====>................]  recovery = 24.2% (1212672/4995008) finish=1.2min speed=48506K/sec

md2 : active raid1 sda5[2] sdb5[1]
      999424 blocks super 1.2 [2/1] [_U]
        resync=DELAYED

unused devices: 

Some time later, sync was finished, and I rebooted again. Finally, after this reboot /dev/md10 is automatically mounted to /mnt/array1 again.

Problem solved 🙂

smartctl notes

The values of attributes 5, 197 and 198 should be zero for a healthy drive, so one disk in the NAS is actually failing, but the cause of the hiccup (disconnect) was a core dump by smatctl weekly scan.

  5 Reallocated_Sector_Ct   0x0033   200   200   140    Pre-fail  Always       0
197 Current_Pending_Sector  0x0032   200   200   000    Old_age   Always       13
198 Offline_Uncorrectable   0x0030   200   200   000    Old_age   Offline      11

Windows for UNIX users

Command examples written for manipulating files on an old drive with remaining crap from windows.

chown, rm: Delete old windows / program files from second drive

chown -r root:root <Directory>

takeown /F "F:\ProgramData" /A /R /D Y
icacls "F:\ProgramData" /T /grant administrators:F

rm -rf <Directory>
(after chown above)

rd /s /q "F:\ProgramData"

ln
https://www.howtogeek.com/howto/16226/complete-guide-to-symbolic-links-symlinks-on-windows-or-linux/

cp -rp
xcopy <source>\*.* /s/e/f <dest>

Inner secrets of Synology Hybrid RAID (SHR) – Part 2b – My Synology case

At about 30% into the reshaping phase (after the first disk swap), my NAS went unresponsive (disconnected both shell and GUI), and I had to wait all day until I came home and did a hard reset on it and hoped everything went well..

In the meantime, I logged a case to the Synology support. They were not of any direct help, and the hard reset did take the NAS back to continuing the reshaping process.

My case with Synology support

==
2020-12-01 13:51:37
==
Replaced one of the smallest drives in my NAS yesterday (SHR) as a first step for later expansion (I will replace all drives with larger ones before expanding – if possible to delay any automatic expansion until then).

About 80% finished with rebuilding yesterday, but for some reason it started over after the first round.

Today about 30% finished when I lost the connection to the NAS (over ssh and the web interface). It does not auto-reboot and does not respond to ping.

To lessen the risk of data loss, what should my first step be ? Can I just pull the plug and hard-reboot the NAS with the current disks mounted (14TB, 3TB, 3TB, 8TB, 8TB in a SHR config), or is it better to replace or remove the disk that I recently replaced (in slot 1: 14TB in place of the previous still untouched 3TB) ?

What are the steps to getting the volume back online if it does not mount automatically ?

As the NAS is down, I am not able to upload any logs, but attached is the rebuild status before the crash.

==
2020-12-01 15:28:58
Synology response (besides the auto response “send us logs”)
Not useful at all, exactly what I did, “Mark” who replied did not read anything..
==
Hello,

Thank you for contacting Synology.

If you wish to replace a drive in your unit, please perform these steps one by one allowing for the repair to complete before replacing any further drives.
1. Pull out the drive in question.
2. Insert a replacement drive.
3. Proceed to the Storage Manager > Storage Pool > select the volume in question and click “Manage/Action”
4. Run through the wizard to repair the volume in question with the replacement drive.
5. Once complete, proceed to the Storage Manager > Volume and Configure/Edit the volume to configure the volume to have additional size.
Please see the link below for more help.
https://www.synology.com/en-uk/knowledgebase/DSM/help/DSM/StorageManager/storage_pool_expand_replace_disk

Please bare in mind that you benefit from the additional space from the drives you will need to replace at least 2 drives for larger ones in RAID 5/SHR or 3 drives in RAID6/SHR2.
You can see the type of RAID used via – DSM > Storage Manager > Storage Pool.

If you have any further questions please do not hesitate to get in touch.

Best Regards,
Mark

==
2020-12-01 16:02:14
My reply
==
Ok, so I restart the problem description then:

I did (yesterday):
0. Power down Synology
1. Pull out the drive in question.
2. Insert a replacement drive.
3. Proceed to the Storage Manager > Storage Pool > select the volume in question and click “Manage/Action”
4. Run through the wizard to repair the volume in question with the replacement drive.

THEN, today:
4b. Today about 30% finished when I lost the connection to the NAS (over ssh and the web interface). It does not auto-reboot and does not respond to ping.

SO what now ?
As the NAS is unresponsive I will never reach step 5:

To lessen the risk of data loss, what should my first step be ? Can I just pull the plug and hard-reboot the NAS with the current disks mounted (14TB, 3TB, 3TB, 8TB, 8TB in a SHR config), or is it better to replace or remove the disk that I recently replaced (in slot 1: 14TB in place of the previous still untouched 3TB) ?

What are the steps to getting the volume back online if it does not mount automatically ?

Also, is there an option to DELAY the expansion until all drives have been replaces, as you replied changeing the first drive will not expand the volume, but I’m not there yet since I’m stuck in a crash (unresponsive system)

==
2020-12-02 23:25:46
My reply on Synologys’ suggestion to collect logs using the support centre
==
How do I launch “Support Center” on the device when it is unresponsive (which was my initial question – what to do when it hangs in the middle of repairing/reshaping) ?

I forced it off and restarted and hoped for the best – reshaping continued and the second disk is now in reshaping mode.

My other question has not yet been answered:

Is it possible to delay the time consuming step of reshaping until all disks have been replaced ?

Initial configuration: 3TB 3TB 3TB 8TB 8TB

After replacement of the first disk: 14TB 3TB 3TB 8TB 8TB, after reshaping the first disk got a partition to match the 8TB disks.

After replacement of the second disk: 14TB 14TB 3TB 8TB 8TB, while reshaping again, now disk 1 and 2 looks similar with one partition matching the largest of the remaining 3TB disk, one matching the largest on the 8TB disks and the remainder (roughly about 6TB) the same on both 14TB disks.

When replacing the third 3TB disk, I assume the following would happen:
(14TB 14TB 14TB 8TB 8TB)

On the first and second disk, the (about) 3TB partition will be replaced with a partition to match the 8TB disks. Then the remainder (3 disks with 6TB unallocated space) will be used for another raid5 (after yet another reshape)

So my question again; is it possible to delay reshaping until I have had all the disks replaced. I understand that the “rebuild” is needed in between every replacement, but “reshape” should be needed only once.

==
2020-12-03 12:19:07
Synology response
==
Hello,

Thank you for the reply.

I’m afraid you cannot delay or prevent this process, once it starts it needs to run until fruition.

I would suggest to leave this running for now, if the volume does crash fully in the mean time I can take a look at what we can do to recover the volume, but there is not much I can do currently I’m afraid.

If you have any further question please do not hesitate to get in touch.

Best Regards,
Mark
==

The crash

https://unix.stackexchange.com/questions/299981/recover-from-raid-5-to-raid-6-reshape-and-crash-mdadm-reports-0k-sec-rebuild
https://www.google.com/search?q=restart+synology+while+rebuilding
https://community.synology.com/enu/forum/17/post/20414

General SHR and mdraid links

https://www.youtube.com/results?search_query=synology+shr
https://bobcares.com/blog/raid-resync/
https://www.google.com/search?q=mdraid+reshape

Inner secrets of Synology Hybrid RAID (SHR) – Part 2

Changing the first disk and my case to Synology support

Now it was time to replace the first disk. As I assumed this would never go wrong (!) and did not plan to document the upgrade, I did not take out any information about the partitions, mdraids and volumes during this first disk swap.

The instructions from Synology are quite good for this (until something breaks down):
Replace Drives to Expand Storage Capacity

Basically it says: replace the disks one by one, start with the smallest and wait until completion before replacing the next.

For the first disk swap, I actually shut down my DS1517 before replacing the disk (many models, including DS1517, supports hot swapping the disks). When the disk was replaced and I powered up the DS1517, and as expected I got the “RAID degraded” beep.
Did a check that the new drive was recognized, and then started the repair of the storage pool. As this will usually take many hours, and this was done in the evening, I have no idea of the actual time spent for repairing (rebuilding) the pool. This was about 90% finished when I stopped looking at the status around midnight that day.

The next day, I see that it had “restarted” (lower percentage than yesterday), but this is actually the next step that is initiated directly after repairing the pool. It’s called “reshaping” and during that process other mdraids are changed and adjusted (if possible) against the new disk.

Changes during the first disk swap

These are only assumptions, because I did not take enough info in between swapping the disk and until about a third into reshaping.

At the point of changing the first disk (refer to the previous part of my article), my storage pool/volume consisted of two mdraids joined together:
md2: RAID 5 of sda5, sdb5, sdc5, sdd5, sde5: total size about 11.7TB
md3: RAID 1 of sdd6, sde6: total size of about 4.8TB

When I pulled the first drive (3TB) and replaced it with a 14TB drive, I assume the partition table on that disk was created like this (status pulled from the mid of reshaping after first disk swap, so I’m pretty sure this is correct):

/dev/sda1                  2048         4982527         4980480  fd
/dev/sda2               4982528         9176831         4194304  fd
/dev/sda5               9453280      5860326239      5850872960  fd
/dev/sda6            5860342336     15627846239      9767503904  fd

sda5 was matched up with the size of the old sda5 (and the ‘5’-partitions on the other disks)
sda6 was also created in either the step before rebuild, or right before reshaping (this partition match the size with the ‘6’-partitions on sdd and sde.
Because the (14T) disk is larger than the previous largest (8TB) one, there are some non-partitioned wasted space (about 5.8TB which will come into use after the next disk swap).

Reshaping

Again, I have not taken any full status dumps so that my information can be confirmed, but this is what I see afterwards, and adding my guesses to it because of the better logging of later disk swaps.

After the storage pool was repaired, reshaping started automatically. During this step, the RAID1 consisting of sdd6 and sde6 (md3) were changed into RAID5 consisting of sda6, sdd6 and sde6.

At about 30% into the reshaping phase, my NAS went unresponsive (disconnected both shell and GUI), and I had to wait all day until I came home and did a hard reset on it and hoped everything went well..

In the meantime, I logged a case to the Synology support (see “Part 2b” of this article). They were not of any direct help, and the hard reset did take the NAS back to continuing the reshaping process.

Inner secrets of Synology Hybrid RAID (SHR) – Part 1

Inner workings of Synology Hybrid RAID

Maybe a too much promising title for this post, but this is my guesswork on how SHR works when replacing drives. If anyone have a spare DS1517 (or later device, with at least 4 slots) to donate, I will investigate this further, cannot afford to do it on my primary NAS because of risk of loosing data – and now even not possible without upgrading the disks again to larger ones).

I will also post here my case (more or less in full) sent to Synology when the NAS got unresponsive (crashed) during the rebuild/reshaping process.

What is Synology Hyrbrid RAID ?

This is in fact the only thing Synology themselves have briefly explained in their documentation:
What is Synology Hybrid RAID (SHR)

My short explanation is that it is a software RAID that is able to maximize the utilization of mixed sized hard drives. For simplicity, Synology illustrates this with drives varying of 500GB to 2TB (in 500GB increments), possibly fooling some people to think that the disks are always split into 500GB partitions.

My findings while expanding my DS1517 (from 3TB, 3TB, 3TB, 8TB, 8TB to all 14TB) is that the remaining space of the drives are splitted in as few parts as possible to obtain the maximum available space (after setting aside about 2.5GB for the DSM (operating system) and 2GB for swap).

Replacing disks and rebuilding the RAID

Before I replaced the first disk, I actually forgot to view and save down the info about the partitions, mdraid volumes and logical volumes (I might have that somewhere else, but I will not look for it now). Based on how it looked after the first disk had been replaced, and the rebuild was done (in the process of reshaping) it should have been something like this:

# sfdisk -l
/dev/sda1                  2048         4982527         4980480  83
/dev/sda2               4982528         9176831         4194304  82
/dev/sda5               9453280      5860326239      5850872960  fd

/dev/sdb1                  2048         4982527         4980480  83
/dev/sdb2               4982528         9176831         4194304  82
/dev/sdb5               9453280      5860326239      5850872960  fd

/dev/sdc1                  2048         4982527         4980480  83
/dev/sdc2               4982528         9176831         4194304  82
/dev/sdc5               9453280      5860326239      5850872960  fd

/dev/sdd1                  2048         4982527         4980480  fd
/dev/sdd2               4982528         9176831         4194304  fd
/dev/sdd5               9453280      5860326239      5850872960  fd
/dev/sdd6            5860342336     15627846239      9767503904  fd

/dev/sde1                  2048         4982527         4980480  fd
/dev/sde2               4982528         9176831         4194304  fd
/dev/sde5               9453280      5860326239      5850872960  fd
/dev/sde6            5860342336     15627846239      9767503904  fd

Note: The partition types for sd[a-c][1-2] seems incorrect as these where changed to “fd” later on during the process, or it might have been something changed by Synology on later DSM versions (but not at the point of updating DSM).

Partitions 1-2 are the system and swap partitions on all the drives, sized 2.5GB respectively 2GB.
Partition 5 is a part of the storage space available in the volume on the NAS. In this case it is about 2.9TB in size (the maximum available on the smallest disks).
Partition 6 is the second part of the total storage space. At this time those partitions are about 4.8TB in size.

mdraid volumes

Out of the partitions above, the Synology creates these mdraid volumes:
md0: RAID 1 of sda1, sdb1, sdc1, sdd1, sde1: total size 2.5GB used for DSM
md1: RAID 1 of sda1, sdb2, sdc2, sdd2, sde2: total size 2GB used for swap
md2: RAID 5 of sda5, sdb5, sdc5, sdd5, sde5: total size about 11.7TB
md3: RAID 1 of sdd6, sde6: total size of about 4.8TB

LVM logical disk

md2 and md3 are joined together into a logical disk using LVM, which gives about 16.5TB space in total for the storage volume on the NAS (Synology DSM says 15.5TB, but the difference is only because of how I estimate the space and how Synology does – I just take the block count, divide by two, then use a one decimal precision – which is adequate enough for this description).

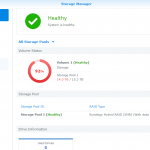
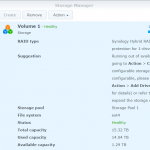
DSM Storage Manager before replacing the first disk

… to be continued in part 2 …

Synology NAS – PHP

Enabling extensions in PHP CLI

https://blackswan.ch/archives/594

Become root
Find out which configuration file is used:
php --ini

I get:
Configuration File (php.ini) Path: /usr/local/etc/php70
Loaded Configuration File: /usr/local/etc/php70/php.ini

Edit the php.ini file, check/change extensions dir to where it is located. If PHP was installed through DSM it should be something like ‘/volume1/\@appstore/PHP7.0’
extension_dir = "/volume1/@appstore/PHP7.0/usr/local/lib/php70/modules/"

Enable the extensions you wish to use:
extension = mysqli.so
extension = phar.so
extension = openssl.so
extension = zip.so
extension = curl.so

Installing Composer

Composer documentationhttps://medium.com/unhandled-code/installing-composer-on-synology-6-1-4-eebd1a1c4891

Become root
Enable the extensions as above (phar, openssl and zip are needed for Composer).

Get and install Composer:
cd /usr/local/bin
curl -s http://getcomposer.org/installer | php70

Create shortcut script ‘composer’ in /usr/local/bin:
#!/bin/bash
php70 /usr/local/bin/composer.phar $*

Set permissions:
chmod --reference=composer.phar composer

Test:
composer --version

Synology NAS – Add disk and include in md0+md1

Adding new disks, including in mirroring of system partitions (md0 and md1)

GNU parted documentation

  1. Add the new disks as hot spare, then remove them (will create the disklabel, otherwise just do this using parted)
  2. Check the partition table of a disk already used for system and swap. Find it by checking mdstat (cat /proc/mdstat)
    # cat /proc/mdstat
    Personalities : [linear] [raid0] [raid1] [raid10] [raid6] [raid5] [raid4]
    md1 : active raid1 sdd2[3] sdb2[1] sdc2[2] sda2[0]
    2097088 blocks [5/4] [UUUU_]
    
    md0 : active raid1 sdd1[3] sdb1[1] sda1[0] sdc1[2]
    2490176 blocks [5/4] [UUUU_]
    
    unused devices:
    
    # parted /dev/sda
    (parted) unit s
    (parted) p
    Model: ATA ST3000DM001-1CH1 (scsi)
    Disk /dev/sda: 5860533168s
    Sector size (logical/physical): 512B/512B
    Partition Table: gpt
    Disk Flags:
    
    Number Start End Size File system Name Flags
    1 2048s 4982527s 4980480s ext4 raid
    2 4982528s 9176831s 4194304s linux-swap(v1) raid
    
    (parted) q
    
  3. Run parted on the new disk
    # parted /dev/sde
    (parted) unit s
    (parted) p
    Model: ATA ST3000DM001-1CH1 (scsi)
    Disk /dev/sda: 5860533168s
    Sector size (logical/physical): 512B/512B
    Partition Table: gpt
    Disk Flags:
    
    Number Start End Size File system Name Flags
    
    (parted) mkpart system ext4 2048 4982527
    (parted) mkpart swap linux-swap 4982528 9176831
    (parted) p
    ...
    Number Start End Size File system Name Flags
    1 2048s 4982527s 4980480s ext4 system
    2 4982528s 9176831s 4194304s linux-swap(v1) swap
    (parted) q
    
  4. Add partitions to system and swap
    # mdadm --add /dev/md0 /dev/sde1
    # mdadm --add /dev/md1 /dev/sde2
    
  5. Check rebuild status using ‘cat /proc/mdstat’
  6. Final result should be something like:
    
    # cat /proc/mdstat
    Personalities : [linear] [raid0] [raid1] [raid10] [raid6] [raid5] [raid4]
    md1 : active raid1 sde2[4] sdd2[3] sdb2[1] sdc2[2] sda2[0]
    2097088 blocks [5/5] [UUUUU]
    
    md0 : active raid1 sde1[4] sdd1[3] sdb1[1] sda1[0] sdc1[2]
    2490176 blocks [5/5] [UUUUU]
    
    unused devices:
    

Buffalo LS220 – BAMP – Buffalo Apache MySQL PHP

Apache (med PHP-stöd) och MySQL pÄ Buffalo (LS220)

Fullt möjligt, men inte sÄ snabbt.
Jag har pÄ en av mina Buffalos Àven testat köra WordPress pÄ LS220n, funkar fram till 5.1.1 med förinstallerad version av PHP. FrÄn version 5.2 krÀvs PHP version 5.6 (jag kommer undersöka om det gÄr att uppdatera php-cgi pÄ Buffalon)

En förutsÀttning för att fÄ det att fungera Àr att den Àr patchad för att tillÄta root-inloggning via SSH:
Buffalo LS220 – root access och andra modifieringar

NÀsta steg Àr att fÄ igÄng en egen virtualhost pÄ den förinstallerade (och tok-felkonfigurerade) Apache 2.2.14 som finns dÀr:
Buffalo LS220 – apache web server
Apache fÄr sitt PHP-stöd genom php-cgi, PHP versionen som Àr tillgÀnglig Àr 5.3.23

Sedan MySQL:
Buffalo LS220 – MySQL server

Övrig Buffalo information

Buffalo forum

Firmware uppdatering

Nyaste firmwaren finns hÀr. Version 1.70 kom i slutet pÄ januari 2018. I början pÄ december 2019 varnade mina LS220s att det finns en ny firmware. 1.73 hade slÀppts, och timestamp pÄ innehÄllet i arkivet Àr 2019-11-19. Mina NASar (och NASNavigator) har slutat att indikera att det finns ny firmware att installera, och jag kör 2020-01-01 fortfarande pÄ 1.70.

Senaste firmware för LS220
Installationen Àr enkel. Ladda ner senaste versionen, packa upp och starta LSUpdater.exe
Programmet hittar sjÀlv de Buffalosar pÄ ditt nÀt som behöver uppdateras.
Var beredd pÄ att innehÄll i /root kommer gÄ förlorat, likasÄ allt som Àr modifierat i filer som följer med systemet (mÄnga av modifieringarna nedan).

TFTP-ÄterstÀllning av LS220D

Ifall nÄgot gÄr helt snett, eller om bÄda diskarna byts. Med tanke pÄ hur kasst BuffaloOS Àr, sÄ kanske det inte ens gÄr byta en disk utan att ÄterstÀlla den.
Completely revocering from a bricked Buffalo Linkstation LS200

KĂ€llor

Den flersidiga trÄden med de av andras och mina inlÀgg Àr kÀllan till alla mina Buffalo-artiklar
Hacka Buffalo Linkstation LS220D (LS200, LS400)