How to Add Border Around Text in GIMP Summary: Create the text. Right click inside the text and select “Path from text”. Add transparent layer. Select – From path (Shift-V). Grow selection. Fill selection on the main layer.
När det inte går spara konfigurationen (full flashdisk):
Om det finns någon gammal version av ASA eller ASDM, så går den plocka bort med “delete”-kommandot show disk
delete disk0:/asa-gammal-fil.bin
Byta version på adsm eller asa som laddas: enable
conf t
asdm image disk0:/asdm-792-152.bin
boot system disk0:/asa924-33-k8.bin
write memory
reload
Laga trasig ASDM-inloggning
https://www.grandmetric.com/knowledge-base/design_and_configure/cisco-asa-enable-asdm-access-asa/
To enable ASDM on Cisco ASA, the HTTPS server needs to be enabled, and allow HTTPS connections to the ASA.
To configure ASDM (HTTP) access to Cisco ASA on particular interfaces, where core and management are the nameifs use following commands:
ASA(config)#aaa authentication http console LOCAL

ASA(config)#http server enable

ASA(config)#http 0.0.0.0 0.0.0.0 inside
Remember to create username, password to be able to authenticate to asdm:
ASA(config)#username admin password secretpassword
This article was cloned for archival purposes from the now defunct site 16bitdust.wordpress.com. The directions worked up to recently when WinUAE 4.x was released. Read through the helpful comments at the end on how to make this work for version 4.
Index, or quick links to the sections
Use these quick links if you know how to do some of the steps.
Partitioning 16 GB Compact Flash card with WinUAE and PFS3
(cloned content starts here)
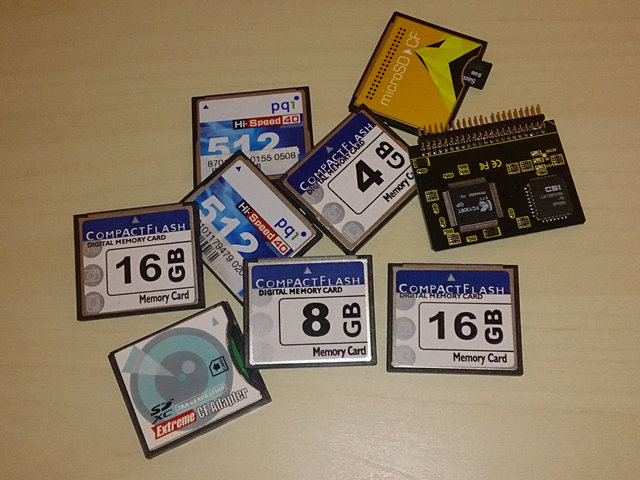
Lately I’ve noticed a lot of questions on how to partition and prepare Compact Flash card (or HDD) for use with Amiga, so I’ve decided to write this tutorial on how to do it and format them as PFS3 partitions.
At least this is how I do it :). Using PC with WinUAE to prepare everything and just pop finished card in Amiga, ready to go.
Preparing Compact Flash card
Regardless if you’re going to do it with real Amiga or with WinUAE, first step is to prepare CF card. For Amiga to be able to use it we need to “clean” any file and partition structures that are present on the card. Luckily, there’s a tool included with windows to do just that, it’s called “diskpart”.
First thing first, connect your CF card to PC, it doesn’t matter how you do it. Integrated card reader, USB card reader, whatever you usually use.
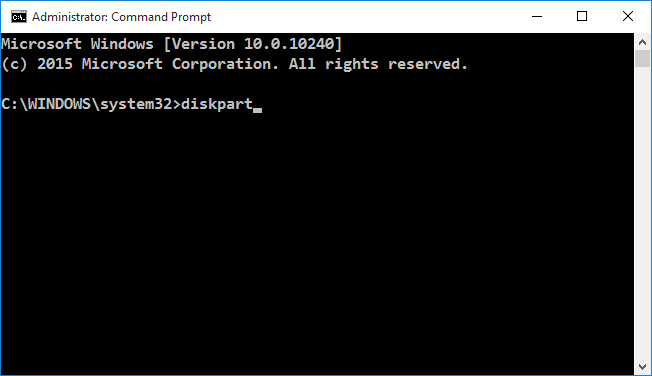
Now we need to start Command Prompt with elevated permissions, aka “as Administrator”. If you have Windows 7 and UAC turned off applications start “as Administrator” by default, but I guess most people use default settings. Anyway, press Start key on keyboard (or click Start icon on taskbar), type “cmd” (without quotes of course, every command I have written with quotes is supposed to go without them, unless explicitly state otherwise). It should find either Command Prompt or cmd.exe, in my case (Windows 10) it was Command Prompt, but if I remember correctly on Windows 7 it says only cmd.exe. Regardless, right click it and choose “Run as administrator”.
Now type “diskpart” and press enter key
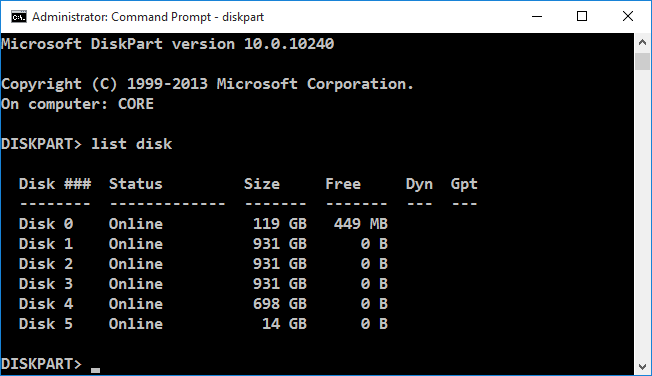
This will load diskpart. Now lets see what drives we have available, type “list disk” and press enter, this will list all disk drives that are present in your computer. Find the one representing your CF card. In my case it was 16 GB CF card so it’s the last one, where is says 14 GB. Note that it’s “Disk 5”.
To select it type “select disk #” where # is number your CF/HDD got, followed by enter of course. In my case it was “select disk 5”
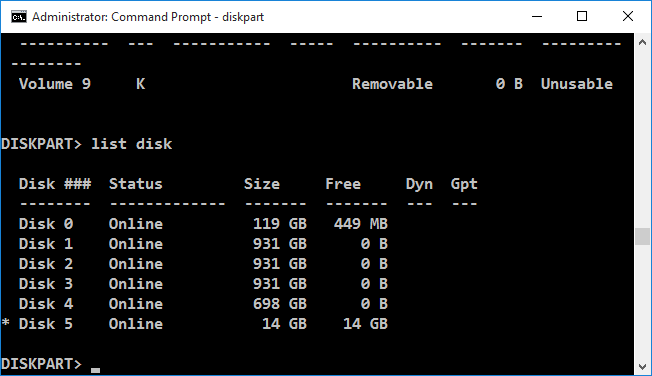
You should get message that Disk # is now the selected disk. To make sure type “detail disk” and press enter
It will output details of currently selected disk. Double check you’ve selected the correct one. If you clean wrong disk it’s bye, bye data. After you’re sure you’re sure 🙂 type “clean” and press enter. You should get a message saying it’s been successfully cleaned. If there was some kind of error make sure you’ve started Command Prompt as administrator.
And that’s it for preparing your CF/HDD. You can check with “detail disk” and/or “list disk” (selected disk will get * sign in front of it) commands to see if it’s been cleaned.
Tools and preparation
To make it a bit easier I’ve prepared small pack of tools and file systems. Simply unzip them in folder and assign the folder as hard drive in WinUAE, we’ll get into more details a bit later. Inside the archive is
Diskmaster – Norton Commnder like file manager HDInstTools HDToolBox loadmodule – command line tool, used for loading modules, we use it to load updated scsi.device that enables large hdd usage Reboot – command line soft reset tool CLI – Shell scsi.device – doobrey’s pacthed scsi.device v44.20, I use it without problems with all my A600/A1200 FS folder – I’ve included few filesystems in this folder, few versions of FFS and latest (at the moment v18.5) PFS3 AIO, you can get newest version from aminet scsi folder – Here I’ve included two scsi.device files I used so far. scsi.device.44.20 is the same one as above, scsi.device.43.45 is patched version of scsi.device 43.43 from WB3.9 BB2 update, reason I included it was because I had problems with 44.20 when used on regular A500 with KS3.1, for some reason it was crashing when it tried to load it, but this version, 43.45, worked fine. I guess it might be something to do with 68000 CPU, when I connected ACA500 with ACA1220 (68020 CPU) to this same A500 it worked fine with v44.20. So just in case, here are both versions.
We’re almost ready for actual work, almost :). First, run WinUAE as administrator, same as with command prompt. Find it’s shortcut (or WinUAE.exe), right click it and choose “Run as administrator”. This will allow WinUAE to access CF card, otherwise OS will block direct access to it.
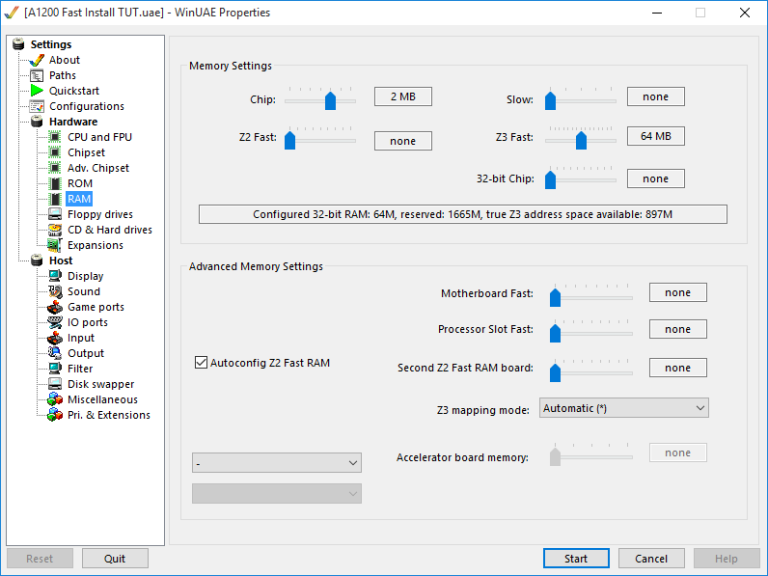
To make it a bit faster I set WinUAE to emulate a bit beefier then standard Amiga. These are setting that I use for prepping CF cards, WB installations, file copying and so on. I saved it as config so I don’t have to set it up every time.
For ROM settings use Kickstart 3.0 or 3.1, whatever you usually use, for floppy settings mount either Workbench or WorkBench Install floppy (again, either 3.0 or 3.1, whatever you usually use) and set it to turbo speed (slider to maximum left), to speed up WorkBench load.
If you use Workbench floppy instead of Workbench install floppy you’ll get one warning from HDToolBox later on, nothing important, we’ll get to that later, doesn’t really matter.
Now go to HDD settings (CD & Hard drives) and click “Add Directory or Archive…” button
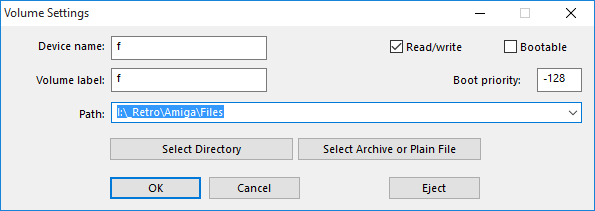
Browse to the folder you unpacked archive from previous chapter. For “Device name” and “Volume label” enter whatever you like. I simply enter “f” in those fields and I’ll use “f” throughout this tutorial. No special reason, that simply means that within workbench you’ll be able to find those files in drive “f”.
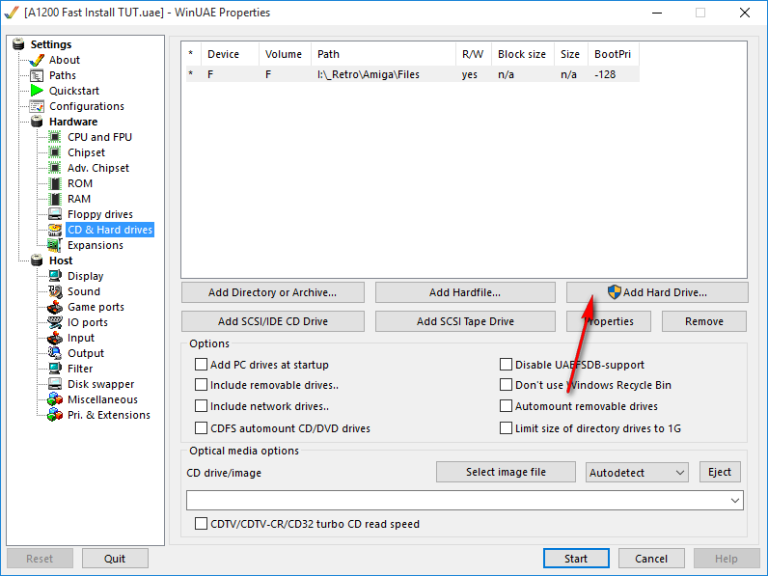
Now we need to add CF card to our virtual Amiga. Click “Add Hard Drive…” button, in new window click on the drop down menu and choose your drive.
Also, from drop down menu that says “UAE” choose “A600/A1200/A4000” and click “Add hard drive” button.
Finally, all preparation is done. All that’s left is to click “Start” button and load Workbench. You haven’t forgot to assign WB3.x floppy to floppy drive, have you?
Preparing the card
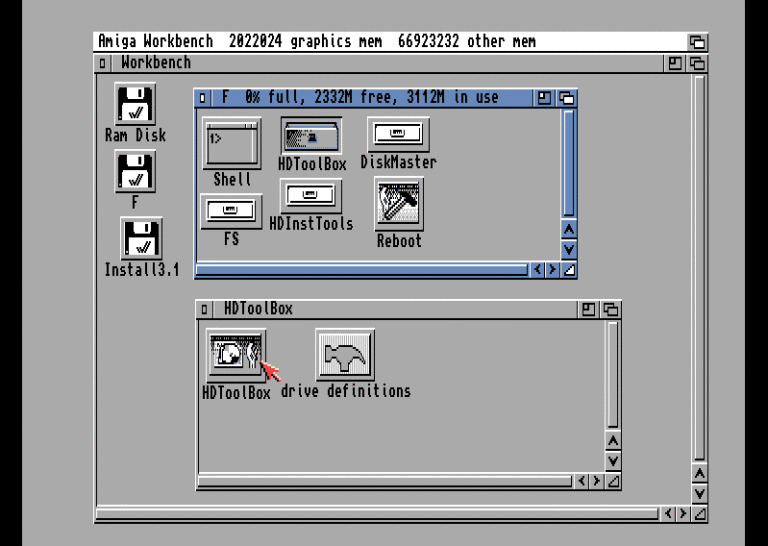
After it finishes loading you should get something like this
First thing we need to do is load patched scsi.device, original one is limited to 4GB and since our card is 16 GB we need to do something about it. If you’ll use 4 GB card you can skip this scsi.device thing, or if you use direct scsi enabled filesystem you can use up to 8 GB HDDs, like PFS3DS, but I prefer to use scsi.device approach even with 8 GB cards.
To load it we need to get to Shell. Since there’s no Shell on Workbench Install floppy I’ve included it in tools archive. Open drive “f” and you’ll find Shell there
Alternatively, if you used Workbench floppy to boot you can also find Shell in Workbench floppy, System drawer.
Switch to drive “f” by typing “f:”, followed by enter key, and finally type “loadmodule scsi.device” and press enter. This will load new scsi.device to memory and reboot our virtual Amiga. After it boots again, we can go back to shell and type “version scsi.device”, output should say version 44.20.
If you reboot from WinUAE (F12 and then “Reset” button) or stop/start emulation again, you’ll have to repeat this “loadmodule scsi.device” procedure, loadmodule survives only soft reset (ctrl + amiga + amiga, or reboot from command line, remember that Reboot file from zip archive?).
Now that we’ve loaded patched/updated scsi.device we can proceed. Open F drive, HDToolBox drawer and finally run HDToolBox.
HDToolBox should load and show one unknown drive. So let’s introduce them, click “Change Drive Type” button.
Click “Define New…”
And Finally “Read Configuration”, to get drive geometry information.
You’ll get one info dialog so just click Continue and you’ll get correct geometry values. Don’t mind Size negative size. That’s only visual, HDToolBox wasn’t meant for drives so big so they never bothered to use big variables, this is simple programming variable overflow, drive will be formatted correctly.
If you want to precisely set partition sizes you can use calculator I made, at bottom left there’s link to PDF on how to use it. You just need Cylinders, Heads and Block per Track values from this HDToolBox window.
Now just click “Ok” on this and next window.
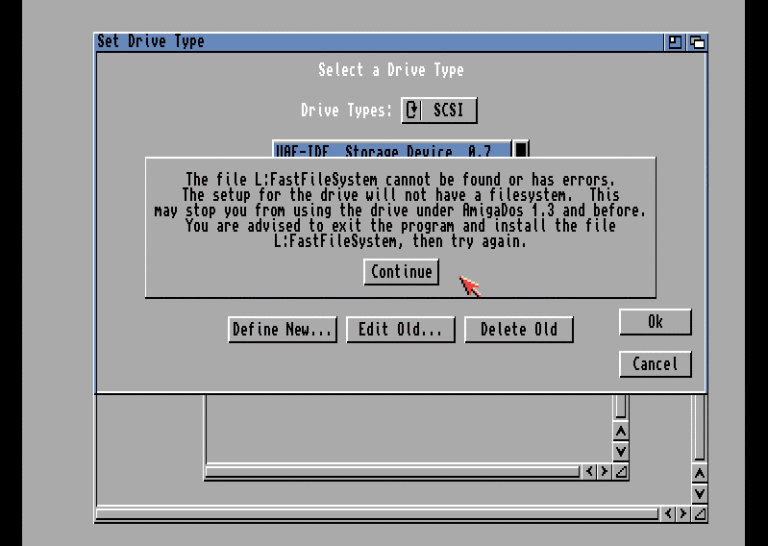
If you used Workbench floppy to boot you’ll probably get warning complaining how it can’t find L:FastFileSystem, just click continue. Reason for this is that Workbench floppy doesn’t have FFS driver on it. It’s on Install floppy, where HDToolBox usually is so it can find it automatically. If you used Workbench install floppy to boot you’ll simply be back to starting HDToolBox window.
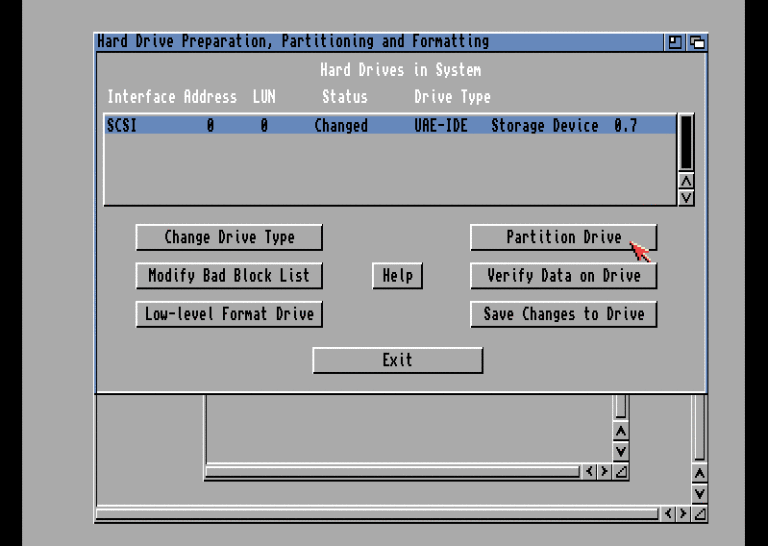
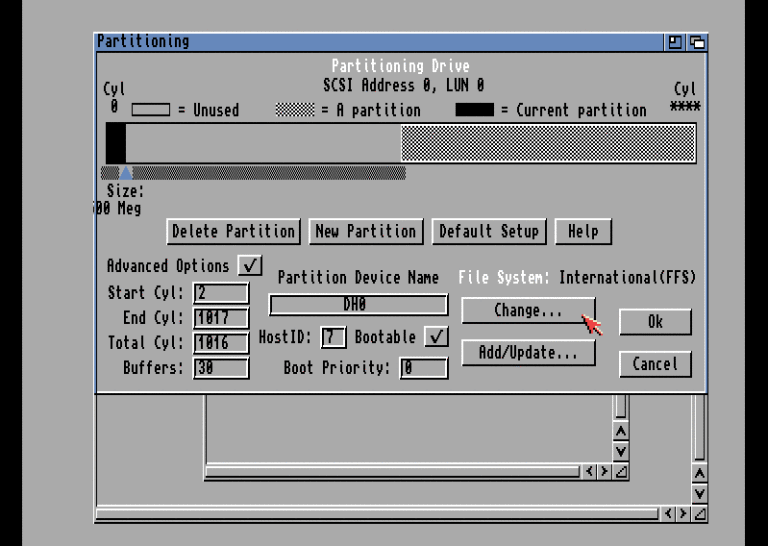
Now that we’re back at starting window, you’ll notice that all buttons have unlocked and that drive is no longer “unknown”. Click “Partition Drive” button
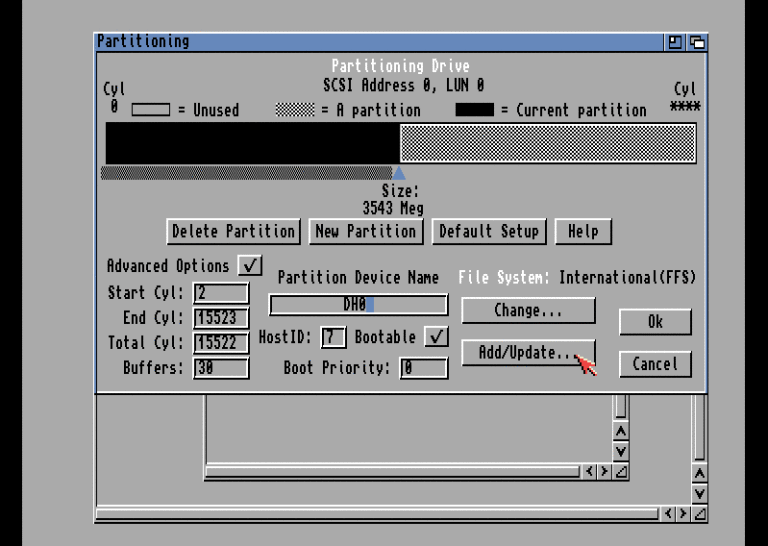
Add checkmark on “Advanced Options” checkbox
Edit “Partition Device Name” from UDH0 to DH0 (I guess it doesn’t matter, but traditionally HDD partitions are named DH0, DH1 and so on), and click on “Add/Update…” button.
Again, if you used Workbench floppy to boot, you wont’ have anything in the list. If you used Workbench install floppy you’ll have Fast File System loaded. If you don’t intend to use it, simply select it and click “Delete File System” button.
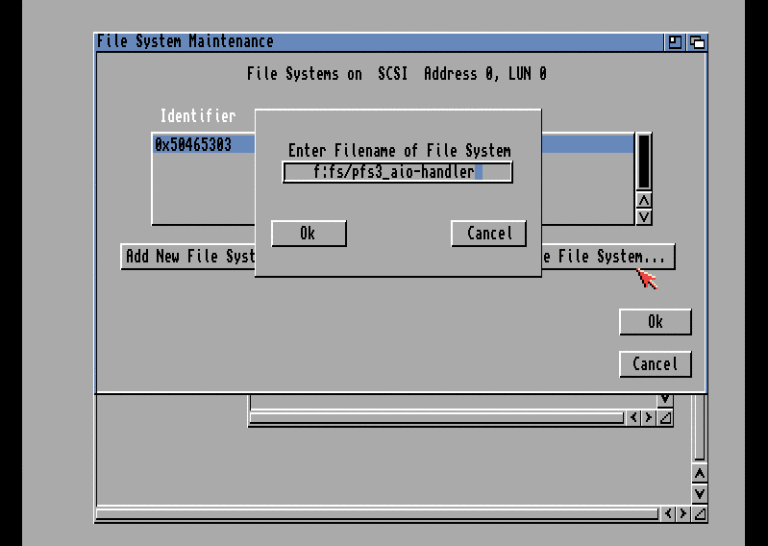
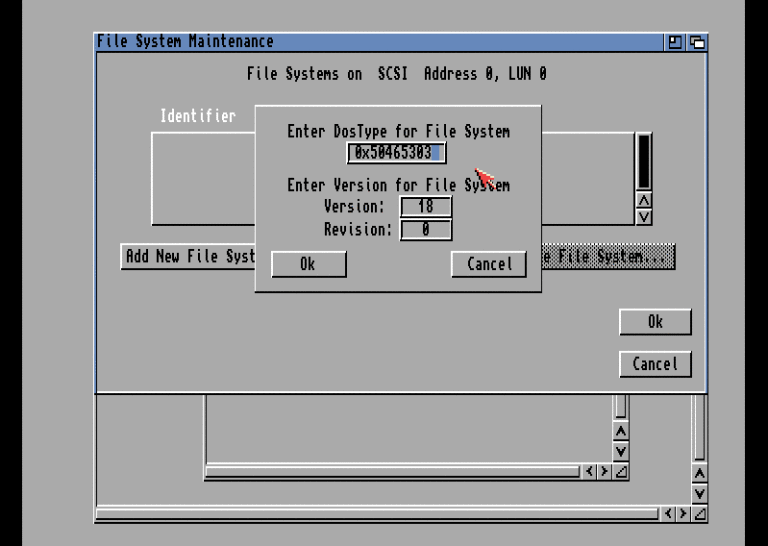
To add new file system click on “Add New File System…” button
And type path to file containing desired file system. In that zip file from beginning I’ve put them in FS folder and file name is pfs3_aio-handler, so in this case I typed “f:fs/pfs3_aio-handler”, and click “Ok” button.
Now we need to enter DosType for PFS3, for PFS3 it’s
0x50465303
For PFS3DS aka PDS3 DosType would be 0x50445303 (pfs3_aio-handler supports PDS3, you just need to type this instead of PFS3 one, everything else is the same) and FFS would use 0x444F5301, just for info.
You can leave “Version” and “Revision” fields at default values, sometimes I edit “Revision” to 5 since this is PFS3 v18.5 but it’s not like it really matters. Again, click “Ok” button.
Now we have PFS3 loaded. We can load more filesystems, I’ve included few FFS versions in FS folder. When I started with Amigas few years ago I usually used FFS for DH0 and PFS3 for DH1, but actually there’s not much point to it, PFS3 is better (more modern) than FFS, and OS had to load two drivers so that resulted in a bit more memory used.
Now to set the partition up. I’ve resized it to 500 MB. You can do this via partition slider, which is unprecise, or by directly entering Start Cyl and End Cyl values. Which is what I did. To get those values you can use calculator I mentioned earlier. Finally, click on “Change…” button.
First click on “File System:” block thingy until it says “PFS\03” and then edit MaxTransfer value to 0x1fe00 (these are zeroes, not “O”s) AND PRESS ENTER TO CONFIRM THE VALUE. This is a “feature” on this window, if you enter the value and click “Ok” it will not apply but revert to original value. You have to press enter and then click “Ok” button.
Now set second partition to size you want. I usually use all of the rest of space for it, you can simply stretch it, no need to be precise for that. And repeat last step on it (Change…, File System, MaxTransfer). After you’re done with both (or more) partitions click “Ok” button to return to main HDToolBox window. All that’s left is to click “Save Changes to Drive” button. Only visible difference will be drive status, it will change from “Changed” to “Not Changed”.
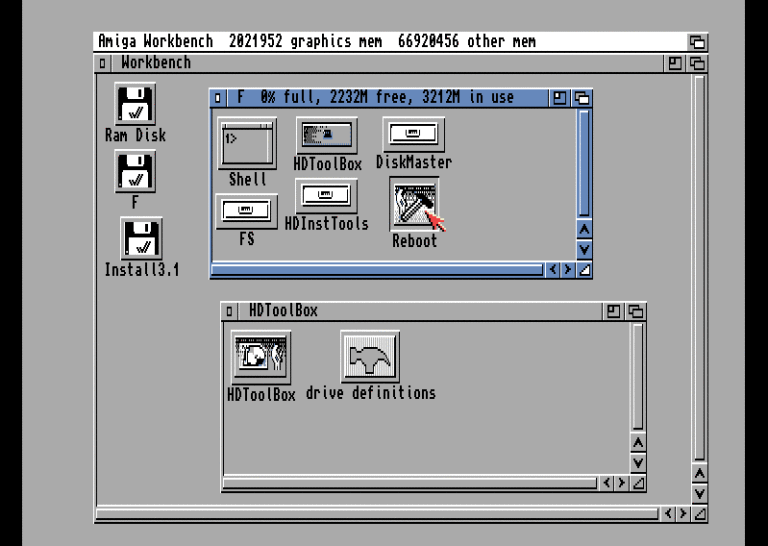
Exit HDToolBox and reboot. In some rare occasions new partitions appeared immediately after I saved changes in HDToolBox, but in 90% of cases they didn’t. After reboot they appeared.
Easiest way is to double click Reboot icon that should be in “F” folder so do it. Or open shell again, go to drive “F” and type “reboot” followed by enter. But double clicking Reboot icon is faster/easier.
If you reboot from WinUAE control panel, you’ll have to do that “loadmodule scsi.device” thingy again. Alternative is to reboot via keyboard shortcut (Ctrl + Amiga + Amiga).
After reboot you may have to wait few seconds (3-5) for partitions to appear. But they should appear.
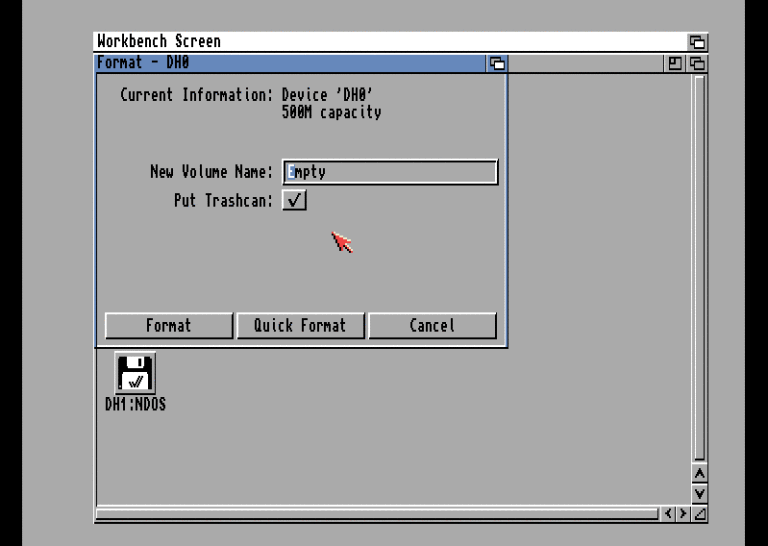
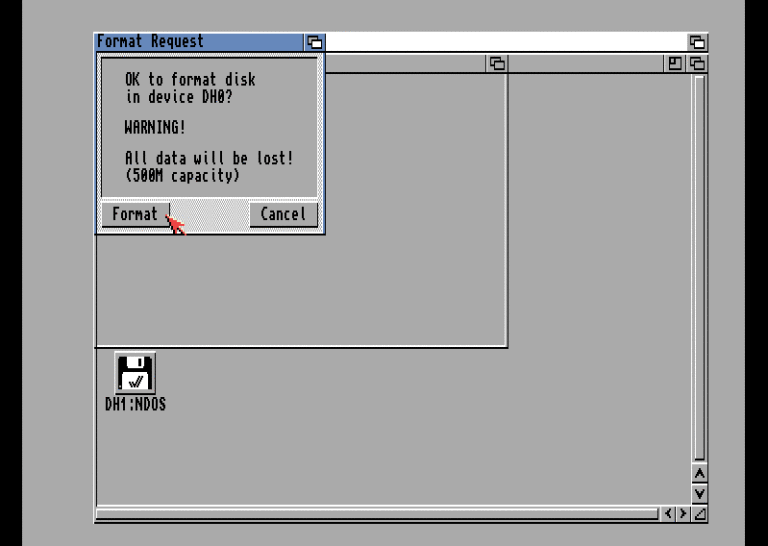
Select first one (DH0), press right mouse button and go to toolbar at the top, choose “Icons” and “Format Disk…”
Enter name you want your drive to have, like System, Main, Workbench… whatever, uncheck “Put Trashcan” checkbox if you want (I uncheck it) and click on “Quick Format” button. This is a must when using flash media like CF cards.
You’ll get two warnings asking you if you’re sure you want to format it, click “Format” button on both dialogs.
Lastly you’ll get one more dialog, simply informing you about some PFS3 info, click “Ok” and wait a bit for format to complete.
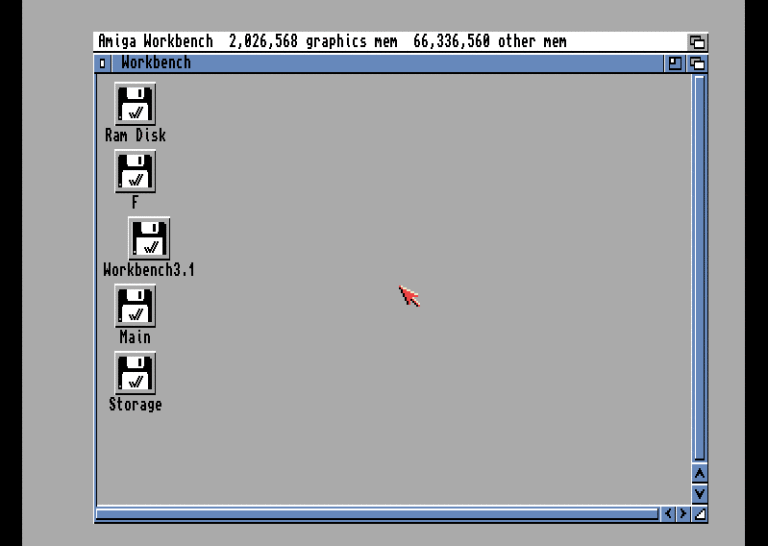
Repeat for second (and all consecutive ones if you made them) partition, this one might take 30-60 seconds to complete as it’s quite a bit larger. After it’s done you’ll have two partitions, 500 MB and 14+ GB formatted as PFS3.
Now you can install Workbench on it. But remember, if you make hard reset you’ll have to manually load patched scsi.device again, BEFORE you make any change to filesystem. Usually first partition will be accessible since it’s 500 MB, but DH1 will be NDOS again until you load scsi.device.
If you install Classic Workbench you can simply copy this scsi.device to DH0:DEVS folder, it will load it automatically on boot. If you install “plain” Workbench you’ll have to manually add it to startup-sequence. Tutorial on how to do this is here.
Just be sure to use same scsi.device you used to when partitioning the drive. There are more than one, others might work, but they may also result in corrupted data.
Recovering a lost session (it’s not possible, Chrome does not make copies of the “Current Session” and “Last Session” files), otherwise than being fast at the first startup after a crash. Session data is stored at AppData/Local (not Roaming as %AppData% points to)
%AppData%\..\Local\Google\Chrome\User Data\Default
In my last crash, I also had a “Default” folder inside the “Default” folder, containing session and history files.
Back up whatever is left of the session and history files. The files of interest is “Current Session”, “Last Session” and “History”. The “History” file is your last resort to recover, it could contain many months of visited pages and there is no way to tell which of those was in currently open and lost tabs.
Copy the “History” file to a real operating system which have sqlite3 available. Open the “History” database:
sqlite3 History
In sqlite3, set up csv export mode and filename:
.headers on
.mode csv
.output my-chrome-crash-history-timesort.csv
SELECT datetime(last_visit_time/1000000-11644473600,'unixepoch','localtime'), url FROM urls ORDER BY last_visit_time DESC;
.output my-chrome-crash-history-urlsort.csv
SELECT datetime(last_visit_time/1000000-11644473600,'unixepoch','localtime'), url FROM urls ORDER BY url;
Examine the files by your favorite calc program (LibreCalc).
Edit the php.ini file, check/change extensions dir to where it is located. If PHP was installed through DSM it should be something like ‘/volume1/\@appstore/PHP7.0’ extension_dir = "/volume1/@appstore/PHP7.0/usr/local/lib/php70/modules/"
Enable the extensions you wish to use: extension = mysqli.so
extension = phar.so
extension = openssl.so
extension = zip.so
extension = curl.so