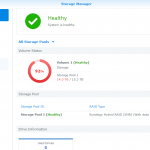
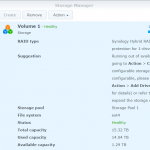
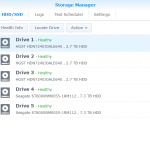
I’m currently taking notes about this process again, now when replacing a broken disk and expanding the storage of my “DS918” Fakenology (a Buffalo). This unit got the three remaining (working) disks from my DS1517 + the fourth one which failed a long time ago (nothing of importance that has not been backed up on this unit). The difference with this unit is that it’s a 4-drive unit, giving me only about 8TB usable space with these 3TB disks.
My notes for the disk replacements will be in another post (secret for now), but if I find out something new about the process, I will also update the documentation here.
Inner workings of Synology Hybrid RAID
Maybe a too much promising title for this post, but this is my guesswork on how SHR works when replacing drives. If anyone have a spare DS1517 (or later device, with at least 4 slots) to donate, I will investigate this further, cannot afford to do it on my primary NAS because of risk of loosing data – and now even not possible without upgrading the disks again to larger ones).
I will also post here my case (more or less in full) sent to Synology when the NAS got unresponsive (crashed) during the rebuild/reshaping process.
What is Synology Hyrbrid RAID ?
This is in fact the only thing Synology themselves have briefly explained in their documentation:
What is Synology Hybrid RAID (SHR)
My short explanation is that it is a software RAID that is able to maximize the utilization of mixed sized hard drives. For simplicity, Synology illustrates this with drives varying of 500GB to 2TB (in 500GB increments), possibly fooling some people to think that the disks are always split into 500GB partitions.
My findings while expanding my DS1517 (from 3TB, 3TB, 3TB, 8TB, 8TB to all 14TB) is that the remaining space of the drives are splitted in as few parts as possible to obtain the maximum available space (after setting aside about 2.5GB for the DSM (operating system) and 2GB for swap).
Replacing disks and rebuilding the RAID
Before I replaced the first disk, I actually forgot to view and save down the info about the partitions, mdraid volumes and logical volumes (I might have that somewhere else, but I will not look for it now). Based on how it looked after the first disk had been replaced, and the rebuild was done (in the process of reshaping) it should have been something like this:
# sfdisk -l
/dev/sda1                  2048         4982527         4980480  83
/dev/sda2               4982528         9176831         4194304  82
/dev/sda5               9453280      5860326239      5850872960  fd

/dev/sdb1                  2048         4982527         4980480  83
/dev/sdb2               4982528         9176831         4194304  82
/dev/sdb5               9453280      5860326239      5850872960  fd

/dev/sdc1                  2048         4982527         4980480  83
/dev/sdc2               4982528         9176831         4194304  82
/dev/sdc5               9453280      5860326239      5850872960  fd

/dev/sdd1                  2048         4982527         4980480  fd
/dev/sdd2               4982528         9176831         4194304  fd
/dev/sdd5               9453280      5860326239      5850872960  fd
/dev/sdd6            5860342336     15627846239      9767503904  fd

/dev/sde1                  2048         4982527         4980480  fd
/dev/sde2               4982528         9176831         4194304  fd
/dev/sde5               9453280      5860326239      5850872960  fd
/dev/sde6            5860342336     15627846239      9767503904  fd
Note: The partition types for sd[a-c][1-2] seems incorrect as these where changed to “fd” later on during the process, or it might have been something changed by Synology on later DSM versions (but not at the point of updating DSM).
Partitions 1-2 are the system and swap partitions on all the drives, sized 2.5GB respectively 2GB.
Partition 5 is a part of the storage space available in the volume on the NAS. In this case it is about 2.9TB in size (the maximum available on the smallest disks).
Partition 6 is the second part of the total storage space. At this time those partitions are about 4.8TB in size.
mdraid volumes
Out of the partitions above, the Synology creates these mdraid volumes:
md0: RAID 1 of sda1, sdb1, sdc1, sdd1, sde1: total size 2.5GB used for DSM
md1: RAID 1 of sda1, sdb2, sdc2, sdd2, sde2: total size 2GB used for swap
md2: RAID 5 of sda5, sdb5, sdc5, sdd5, sde5: total size about 11.7TB
md3: RAID 1 of sdd6, sde6: total size of about 4.8TB
LVM logical disk
md2 and md3 are joined together into a logical disk using LVM, which gives about 16.5TB space in total for the storage volume on the NAS (Synology DSM says 15.5TB, but the difference is only because of how I estimate the space and how Synology does – I just take the block count, divide by two, then use a one decimal precision – which is adequate enough for this description).
DSM Storage Manager before replacing the first disk


